Desiderata:
* Base
* Sharp knife
* Hot glue gun and glue sticks
* Polystyrene packing foam
* Superglue
* Balsa wood
* Balsa cement
* Bamboo skewers
* Paint
* Brushes
* PVA glue
* Sand
1) Grab some polystyrene packaging foam. I have used a ribbed version, as it will give nice look. Cut it so it looks like a two- or three-side ruin, and test that it fits on your base. Do not yet glue it in place. See Fig. 1.

2) Cut holes in the polystyrene foam for windows, and if the walls are a bit thick, carve some bits off them. Make sure you're going to be able to fit models inside the building once it is finished. So you want their base size and a bit more for leeway. You don't want to be damaging your models by trying to squeeze them into somewhere very small. Glue the bits in place on the base. See Fig. 2.

3) Drive some cocktail skewers through the chunkiest bits of the building at various levels, creating supports for your floors. You don't need to glue these in place, but do ensure that they do not protrude much (if at all) from the polystyrene of the outside of the building. Cut some balsa wood into planks, and roughly break these to about the right length. Glue them in place on the bamboo skewers with the balsa cement. See Figs. 3&4


4) The gap between the two large pieces of packing foam I had used to make the building was a bit obvious, so I glued some offcuts of foam over the worst gaps. See Fig. 5.
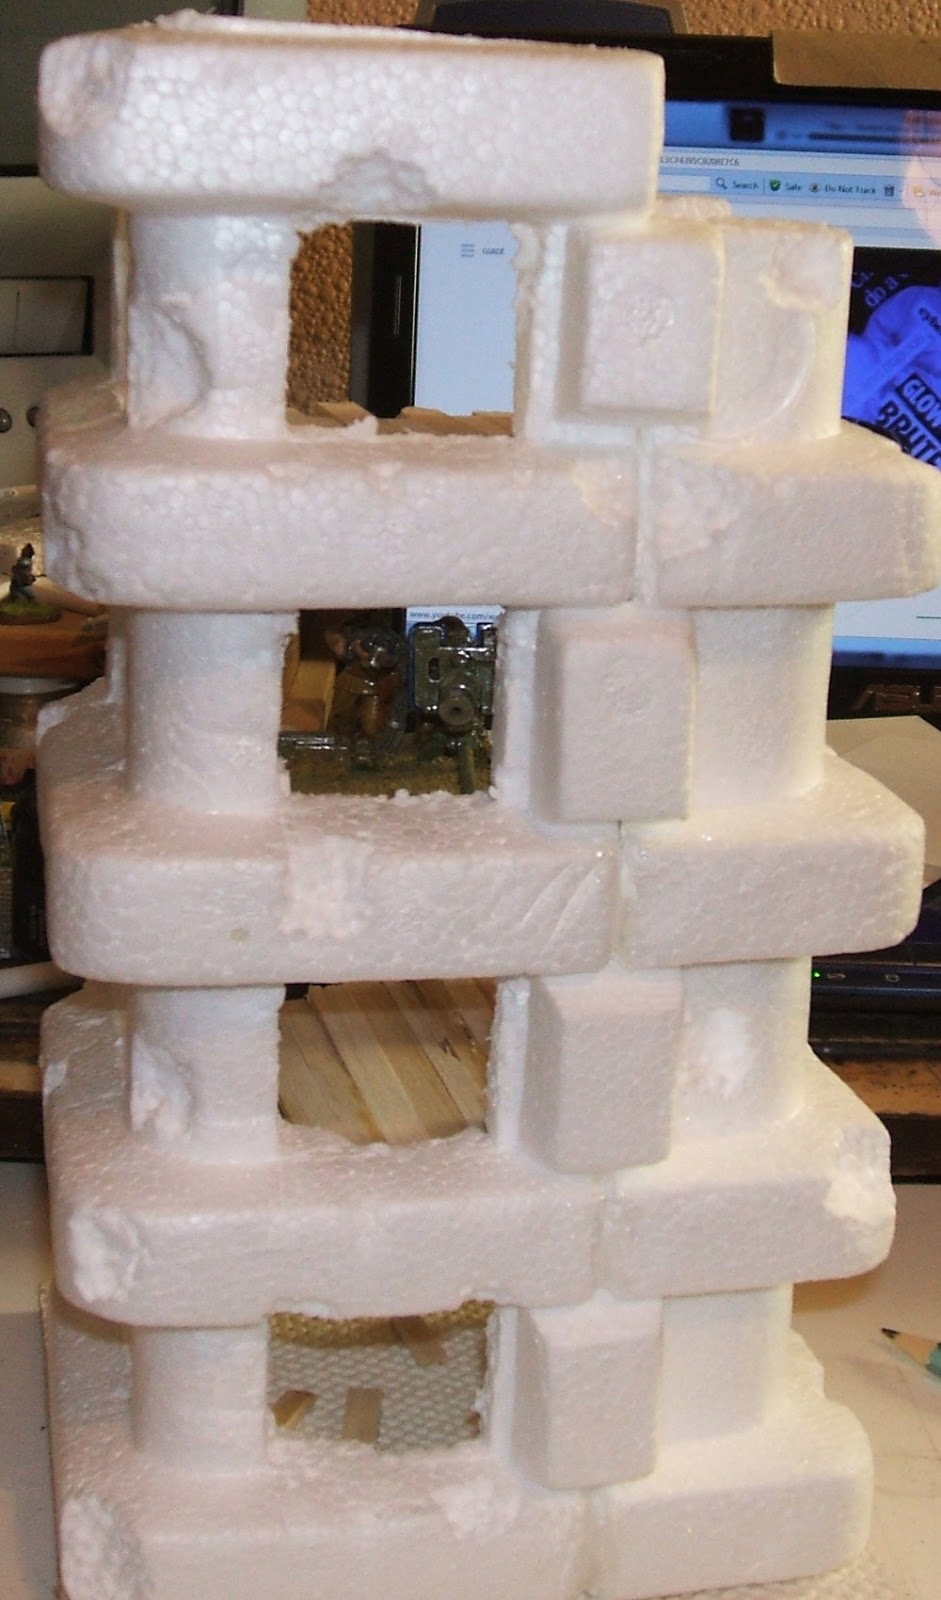
5) Next distress your building. Show it a horror film. Or gouge bits out of it so it really looks as though someone has been blowing bits off it for weeks or longer. You can use polystyrene cement, if you like, as it melts foam, but only do so in a well-ventilated area, as it gives off some fumes. Do not make the holes too deep. I found it impossible to get sand and paint into some of the deepest ones I made. Balsa wood really drinks in paint, so I also gave it a coat of varnish at this point. This isn't the final colour; it's just to keep the wood from devouring all the subsequent paint. See Fig. 6. I added some spare planks to the roof, as though a soldier had put them there for some shelter from the rain, and I drove some more bamboo skewers into the roof, so they appeared to be support poles for higher floors long since destroyed. I applied a layer of glue to the building, and tipped sand over it all. This took a few goes, as the building has to be approached from several angles. As usual, leave it to dry, then apply a coat of diluted PVA to seal it all in.

6) Once that has dried, you can set about painting the ruin in your desired colours. See Figs. 7, 8, 9&10.


I hope you enjoyed that, folks, and it gave you some ideas for that polystyrene mountain. Until next time, happy 'gaming!
It looks the part for sure, and you know what it reminds me of? That massively multi-level structure the GW studio showed in one or two photos back around original Necromunda time. I don't know how modular that was, but your approach looks like it could easily be used for stackable structures and maybe linear too, possibly by having the reinforcement poles plug into holes in adjacent sections. You could build a whole ruined complex, skyscraper wall or hive district edge.
ReplyDeleteThankee! Aye, it would be pretty easy to make this in such a way as to let you add even more floors on the top. Are these pics in the Outlander book? That's really all I have from Necromunda, I think. I'm getting some more hot glue in next Tuesday, DIY place permitting, so might expand on this as you suggest - making a *ridiculously* tall building. I shall have to build myself a Titan so I've something for it to obscure!
ReplyDeleteThere's a pretty good photo halfway down here, but it might need expanding in another window:
ReplyDeletehttp://warllama40k.blogspot.com/2012/04/vintage-white-dwarf-207-march-1997.html
It's bigger than I remember even, but if you wanted to use your elements for similar interior battles Necromunda-style, then vertical and horizontal modularity could do the job: if you had a handful of smaller sections like this one which connected, you could move unoccupied sections from the rear to the front as the models moved through.
Woah! That is pretty incredible! It reminds me of the innards of the block in the recent Karl Urban Dredd film. Hm, that would be a project and a half!
ReplyDeleteThis is great! Thanks for the inspiration man!
ReplyDelete