Desiderata:
* Bases
* Hot glue gun and glue sticks
* Wee magnets
* Foamcard or polystyrene foam
* Superglue
* Plasticard or card for detailing
* Paint
* Brushes
* PVA glue
* Sand
* Ruler and pencil
* Short fat yoghurt/dessert pots
* Tank turrets (either home-made or store-bought)
1) Gather your materials. I've got some Alpro soya dessert pots here, specially bought for the occasion. Let it not be said I am not prepared to go the extra (delicious) mile for this blog! ;-)
2) These small magnets are fiddly critters, and you must take especial care that they don't end up repelling one another. So test that the right sides will face one another, and attract one another, or you will be in a pickle. Get one magnet and superglue it in place in the middle of the bottom of your tank turret. I tend to build a box around these magnets. Superglue is good, but I don't want the magnet coming loose in thirty years (if the magnets still work in that time!). Take another wee magnet, and put it in the middle of the bottom of your dessert pot. Check they line up, and then glue it in place. Again, I used a hot glue gun to build a box of foamcard around it. See Figs. 1, 2, 3&4.


3) Glue the pot upside down to the base with the hot glue gun. You should be able to place the turret atop this, and it should freely rotate. See Fig. 5.

4) Pop some details on the dessert pot and the base. Just imagine what an emplaced turret would need: ventilation for the crew and engine (something has to rotate that turret), perhaps access panels for machinery, identifying symbols, and most importantly an access hatch. Your turret's crew won't necessarily run from its burning wreckage in your games, but it adds verisimilitude to your universe if the option appears to be there. See Fig. 6&7.


5) Using diluted PVA glue, apply sand all over the structure and base. Wait for this to dry, then apply another coat of PVA glue to lock the sand in place.
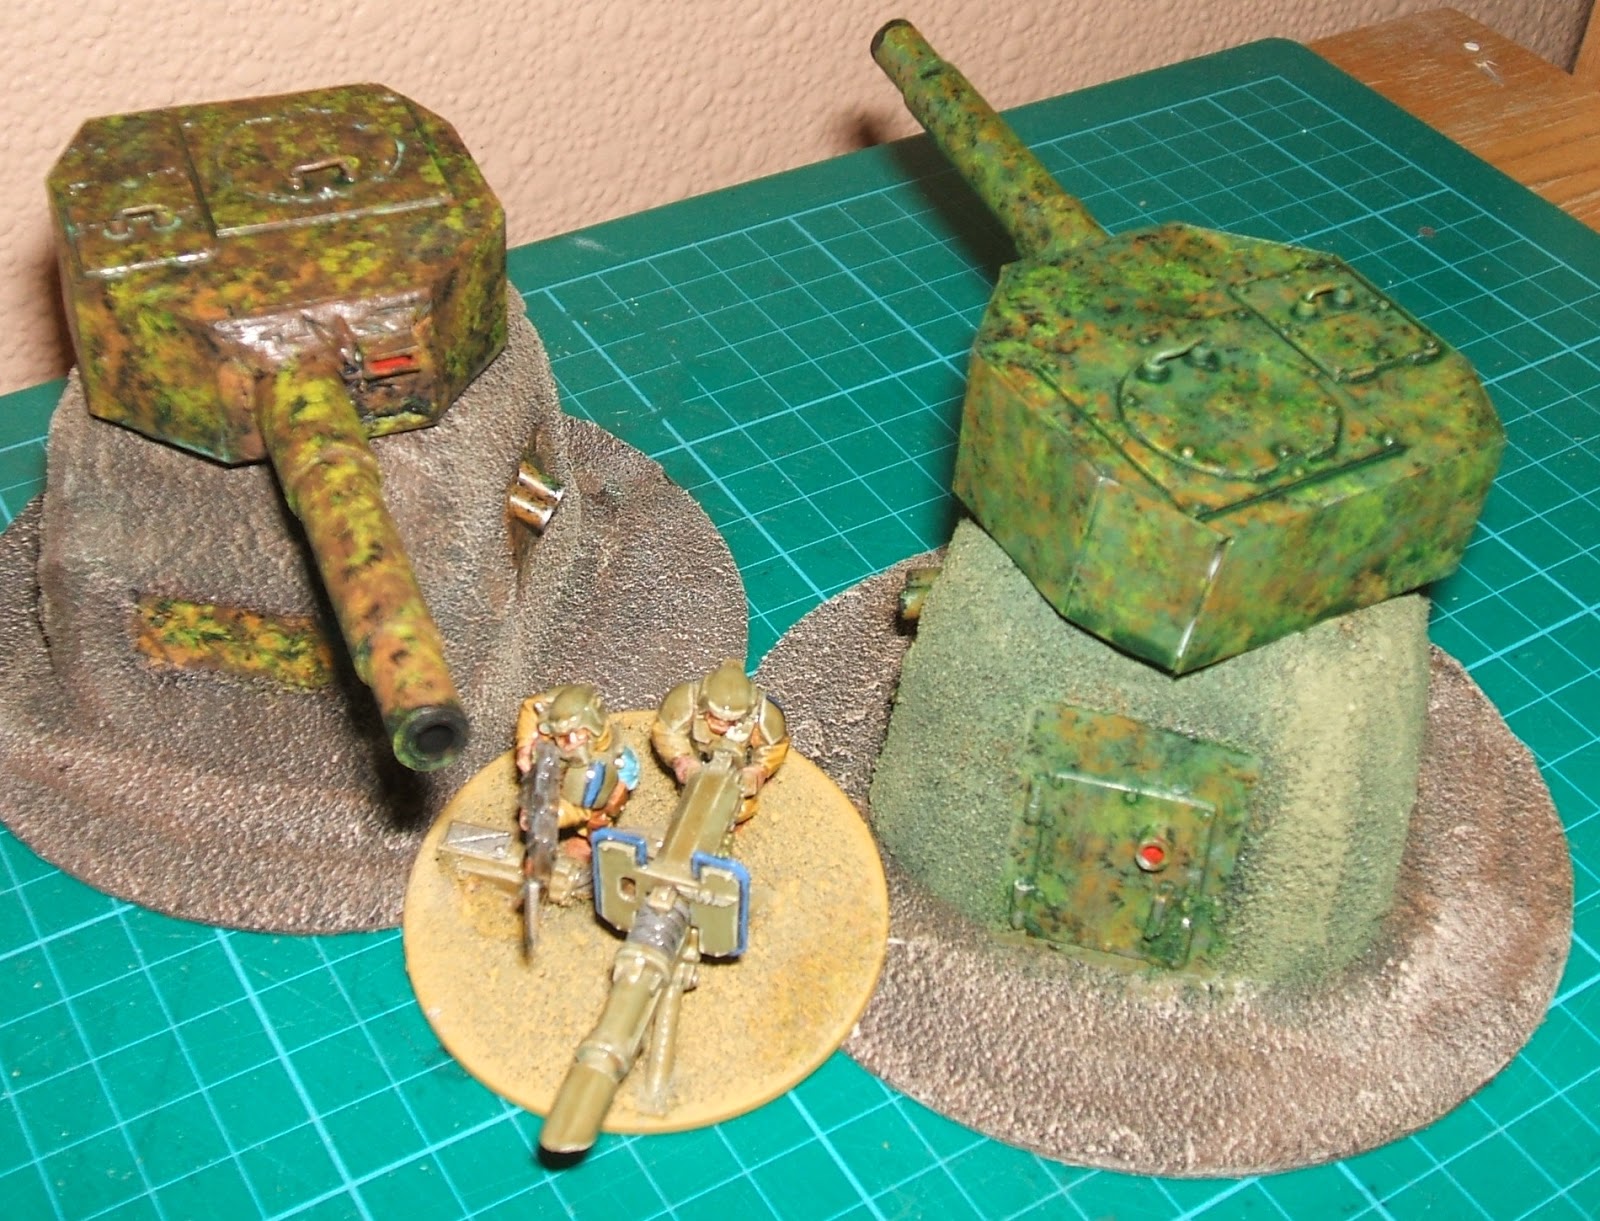
6) Paint the structure as desired, and Bob's your uncle! I painted one in greenish tones and another in splotchy browns and yellows. In painting terms, I applied a load of stippling atop a solid base of either green or brown. See Figs. 8&9.

Until next time, folks, happy gaming!
No comments:
Post a Comment