Monday, 11 March 2013

Terrain Tutorial: Frontier Watchtower

Hey up, folks. This is another in the series of buildings that fit on a CD. This wooden watchtower would be good for games set in the French and Indian Wars or for low tech sci-fi colony worlds. Without further ado, here's how you make it.

Desiderata:
* Hot glue gun and glue sticks
* Foamcard
* Bamboo skewers
* Sharp knife
* Ruler & pencil
* Paint and brushes
* PVA glue
* Sand
* CD or DVD or some other base
* Balsa wood

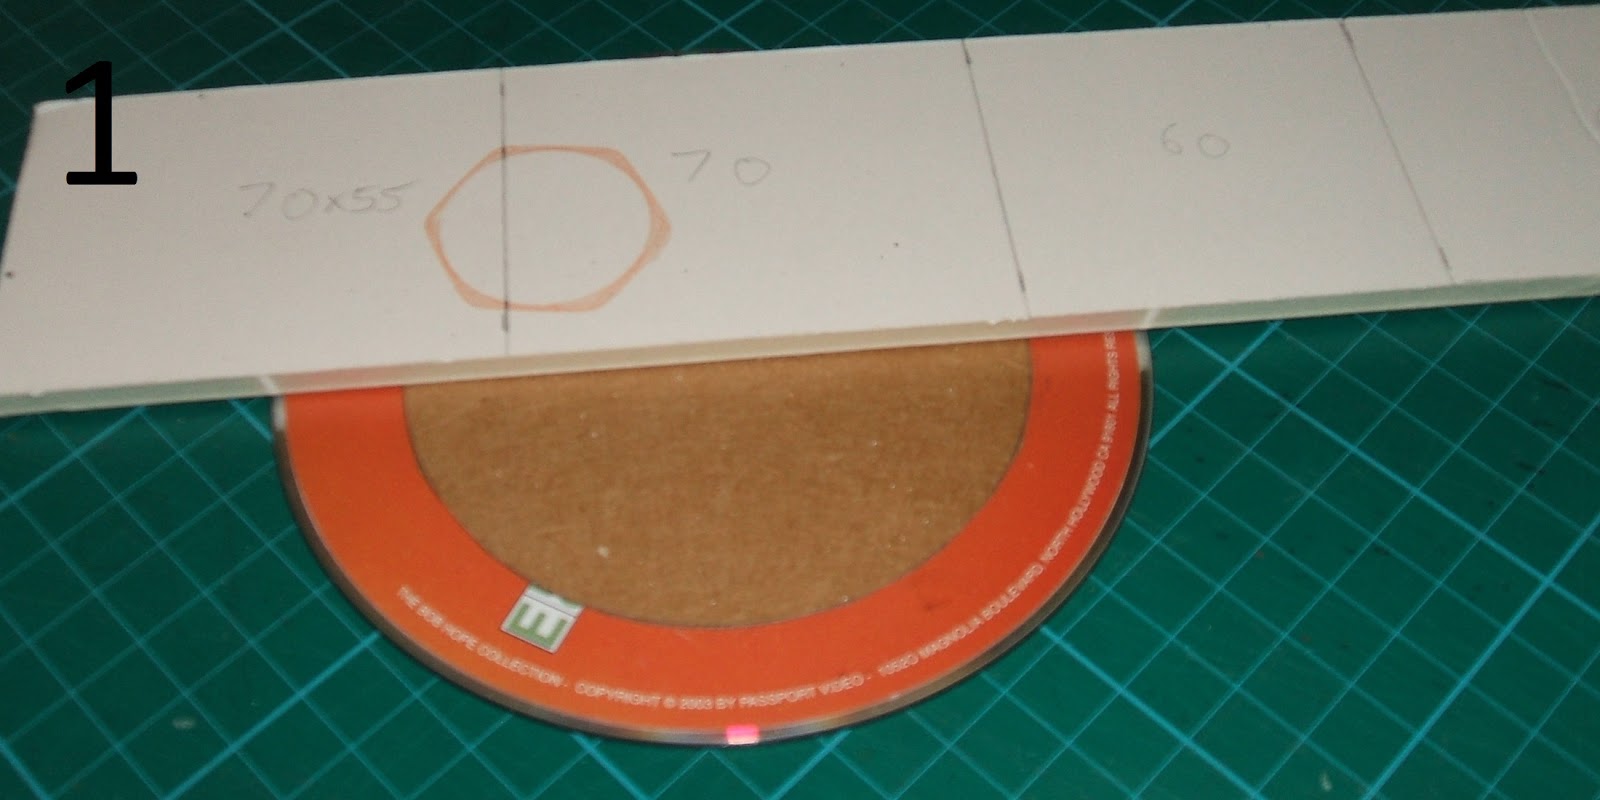
1) Grab your base, and get an idea of how big your building can be. You will be making a square on a circle, so you might want to sketch out the layout first. Once you have the base, you can get an idea for the height of the building. I decided to make a building 120mm tall with walls 70mm long. So I marked out two end pieces of foamcard 120*70mm, and two inner walls of 120*60mm. The foamcard is 5mm thick, so the two end pieces will bring the 60 up to 70mm. See Fig. 1.


2) Pin and glue these pieces together, and leave them to set. See Fig. 2.


3) Glue the building's framework to the base, and cut out pieces of balsa and bamboo. See Fig. 3. The bamboo should be about 70mm long so it matches the walls. You will want a pretty thin balsa. The balsa will be for the door, for the window shutters, and for the top part of the building. Mark out the spots where the balsa will go, and glue it in place. Then glue the bamboo around it with the hot glue gun.


4) For the top of the building, I decided to make the model open to the elements. So I marked a line about 25mm from the top of the wall, and put a piece of foamcard in here, having glued offcuts of foamcard in as supports. I used a pencil to mark the balsa, making it look like planks of wood. I then took a piece of thin balsa and cut a 25mm square out of the middle of it. I turned this sideways, and glued this thin layer of balsa atop the foamcard layer. The square now looked as though it were a trapdoor.

5) I then cut some more pieces of thin balsa, again scribing them with my pencil to resemble planking, and glued them to the internal walls. I levelled everything off with my knife, then glued a single plank of balsa atop this to hide the foamcard. See Figs. 4&5.


6) I added a handle (made from twisted staples) to the trapdoor and the front door, and pressed the tip of my pencil into the ends of planks to give the impression of nails. Then I undercoated the model black, and painted it. See Figs. 6, 7&8.


That's all for today, folks. I hope you find this handy. Until next time, happy gaming!

Saturday, 9 March 2013

Read readily, rapaciously, ravenously.

I mentioned the other day that my friend Bruno Lombardi had written a book called Snake Oil, which is available online here from Amazon and here from Smashwords. Those of you who enjoyed it - or who are enjoying it - will be pleased to learn that Bruno has his own authorial page on Facebook. He is one hell of a guy, and I urge you all to go take a look at that page now. If you haven't bought the e-book, I urge you very strongly to do that, too. You'll be able to tell your grandchildren that you were one of the first to read his splendid work!

Friday, 8 March 2013

Terrain Tutorial: Build anything with this idea!

Grab your foamcard, folks, and strap yourselves in for the ride.

Desiderata:

* Hot glue gun
* Ruler
* Pencil
* Sharp knife
* Small pins
* PVA glue (and water)
* Sand
* Paint
* Brushes
* Basing material - as ever, behold an old DVD in the following pictures.
* Some spare bits of plasticard
* Superglue & polystyrene cement
* Cardboard

1) First mark out the measurements for your box on your foamcard. Maybe it's a power sub-station, a square bunker, a supply building, a colony habitation module or an armoury. It might be square or rectangular or some other polygonal shape. What I have marked out here is a small rectangle. It fits onto a CD/DVD. See Fig. 1.


2) Cut up the bits of foamcard, and glue and pin them together. You'll want a bit of cardboard for the roof of your building. That way, if your measurements re a little off, you can easily rectify any visual problems, cracks, and so on. See Fig. 2.


3) Glue it to your base. See Fig. 3.


4) Add on a few little details. I've knocked up a door for one side and a ladder for the other, allowing units to climb up or down the side of the building during a game. Apply dilute PVA glue to the uncovered areas of the building, then scatter sand atop that. Once it's dry add another coat of dilute PVA atop that. See Figs. 4&5.


5) Make sure all your sand and glue is secure, and slap a load of paint on the model. You can add static grass, clump foliage or whatever you like. Your building's ready for the table. See Figs. 6&7.


You don't just have to use a square or a small rectangle. The other week I showed how to build a stone watchtower, and that uses the very same principles that this tutorial does. All you need to do is alter the dimensions. Until next time, folks, happy gaming!

Wednesday, 6 March 2013

The Shape of Things to Come!

Hey up, folks. I have a load of work lined up to show you, but it's all just ever so slightly away from being finished. Therefore, I hope you enjoy this preview of coming attractions. First up there's a wooden watchtower, good for your French and Indian Wars or regular Warhammer games and the like.


Next is this ruined multi-storey apartment block. Just polystyrene, balsa and a base at the moment. It'll get a layer of sand and a spot of paint before you see it again!


Third is this imposing monolith. I'm not big on glyphs and the like, so I put my education to poor use by writing "LITHOS" on it (Greek for stone).


Fourth is a wee Nissen Hut kind of thing. Maybe it's part of a small colony, or a power relay station, a storage unit.


Fifth is the penultimate word in emplacements. This thing can fit a whole tank in it, or a small platoon of Guardsmen.


I should have the tutorials up for these things pretty soon, folks.Until then, happy gaming!
Related Posts Plugin for WordPress, Blogger...