Detailing the sides:
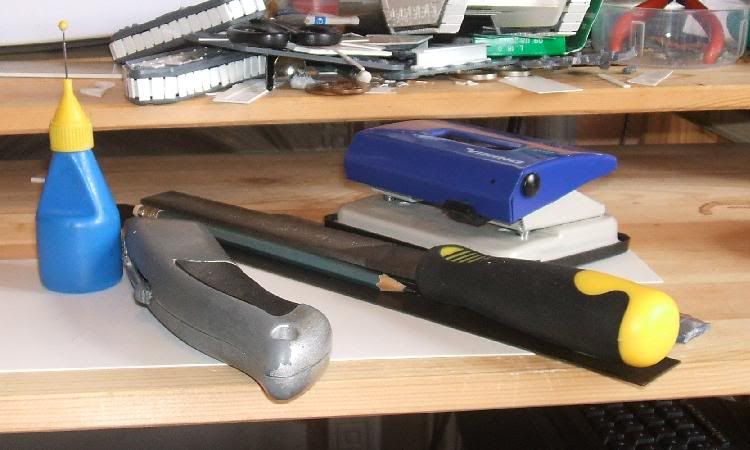
First, get your equipment together. You will need the same as last time (knife, plastic ruler, metal ruler, sharp pencil, file) and three new additions: polystyrene cement, scissors and a hole punch. Instead of the 2mm thick plasticard used to create the side, you will instead want plasticard that's about 0.5mm thick.
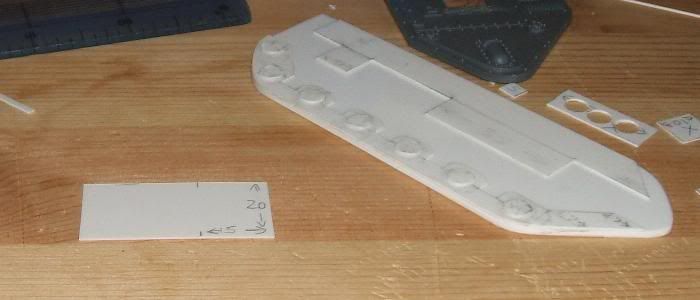
Oops, forgot the scissors. First, cut yourself a strip 20mm wide from the 0.5mm thick plasticard. Aim for this to be a little over twice as long as the side you want to detail.
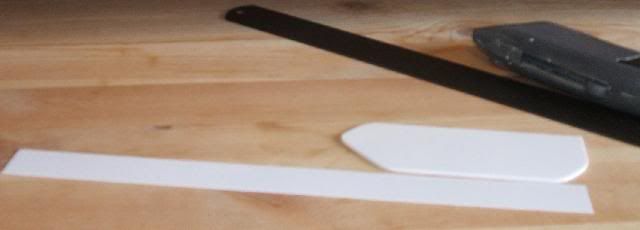
Place the side you made earlier over the plasticard strip you just made and draw around the curves at front and back.
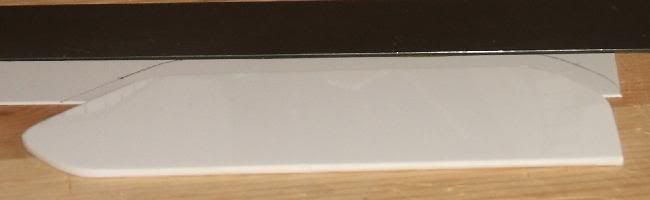
Leave a little under a centimetre in case of mistakes, and with your scissors cut the marked portion off the strip. Put the remainder of the strip aside for later.
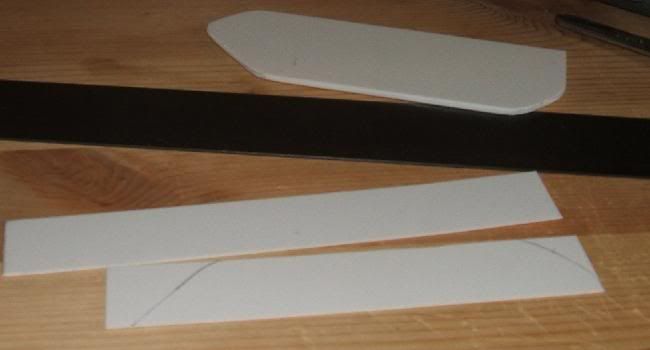
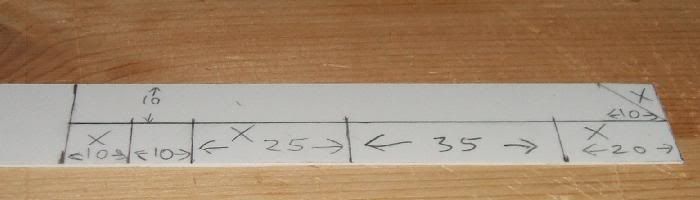
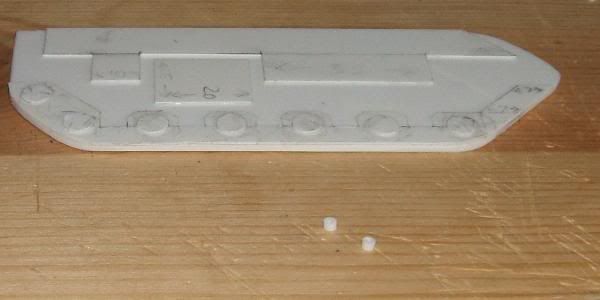
Ensure that the marked strip is close to the dimensions of the larger piece, then with your scissors cut off the surplus plasticard. Remember still to leave a bit of space outside the boundaries so that you can fiddle later. Now get your ruler and pencil. First, draw a line dividing your 20mm strip into two 10mm portions, one upper and one lower. Make no cuts yet. Then divide the lower 10mm into two 5mm strips with another line. Then mark a point on the upper line, that which divides the plasticard into two 10mm strips. It should be about 7mm in from where your original pencil marking tells you the end will be. Mark a similar point about 7mm in along the top edge of the plasticard strip and connect them with a line. Then make a series of markings on the 10mm and 5mm dividing lines as shown in this picture. They should alternate 10mm and 5mm thus.
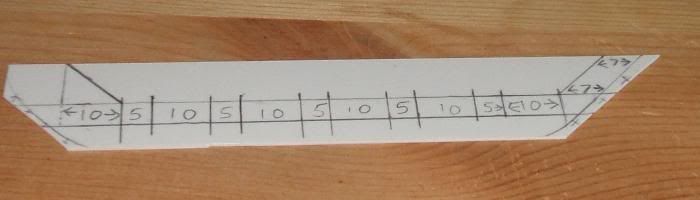
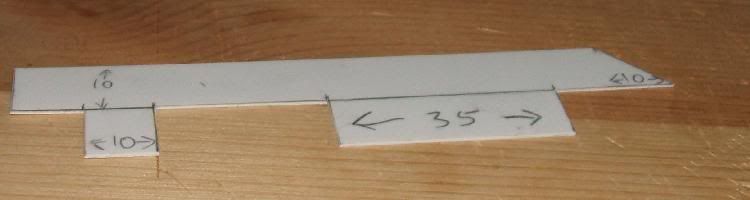
Now carefully cut off the 5mm portions and the large upper portion, until you are left with this.
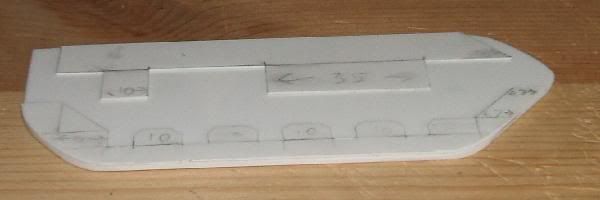
Then trim the corners off the corners of the blocks marked ten. You can measure this, but I tend to eyeball it.
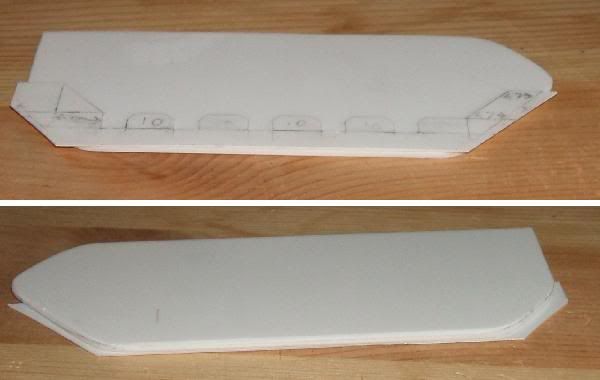
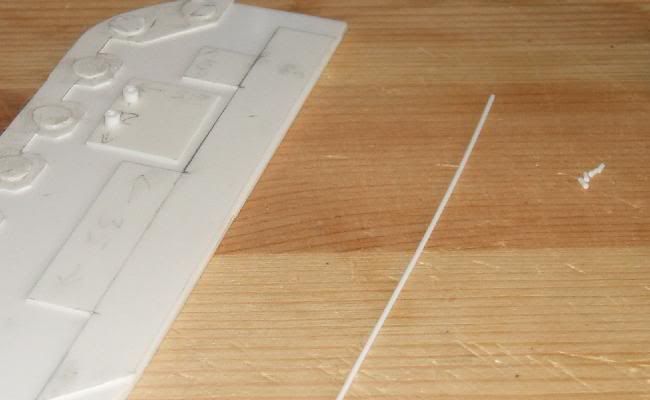
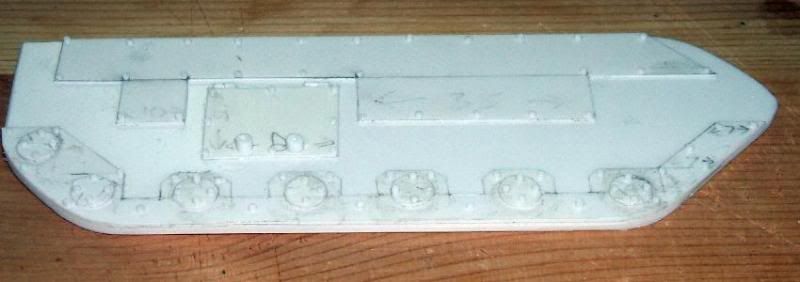
Right, you're almost there! Now just apply glue to the back of it and line it up on the side of the big piece of 2mm plasticard thus. Note that there will still be overhang. Do not trim this yet. You must wait until the glue is properly set.
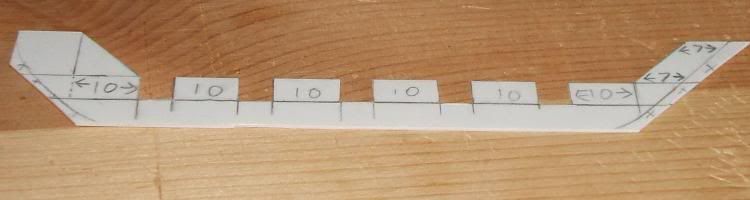
Now we leave the lower part for a time, and move to the upper part. Recover the remaining piece of 20mm which you earlier set aside and divide it thus. However, where I have written 35, you will probably prefer to measure 40mm instead, as on my finished example it looks a tad too small.
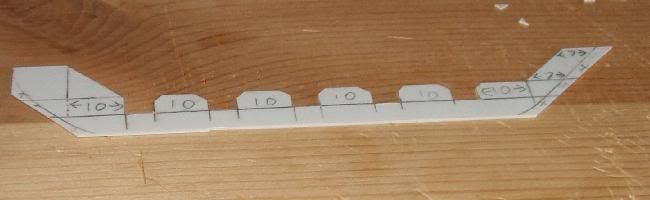
Cut away the marked pieces until you are left with this.
Now glue this onto the upper half of the side of your tank. By this time the lower portion should be secure, so you can now trim away with your scissors or knife, then file the corners smooth, and carefully remove the fluff with your knife.
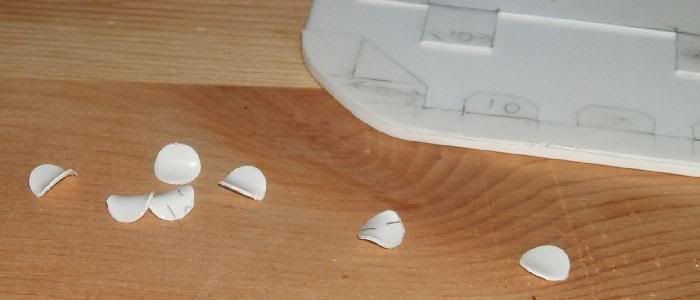
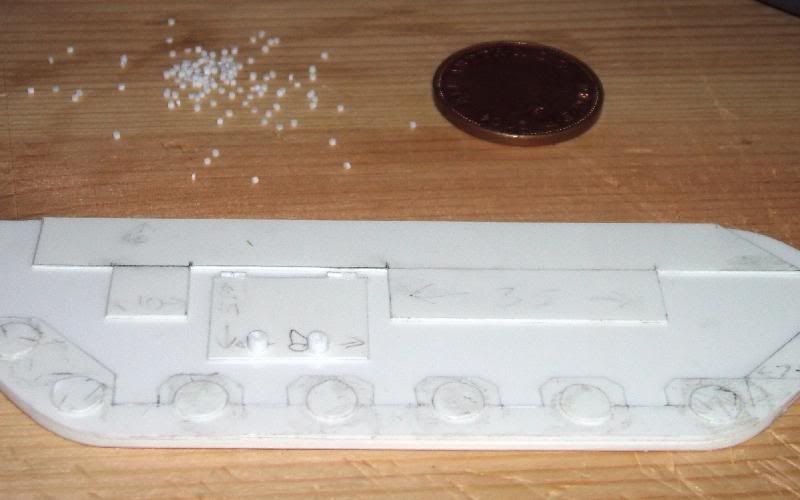
Now find some scrap plasticard of 0.5mm thickness. Use your holepunch to make seven circles, and collect them from the holepunch's storage pocket. Press your thumb against them to flatten them out a little. See how the rightmost one is flatter than the others.
Put a small dab of glue beneath each one and use your thumb to press it on firmly. Incidentally, if I were not already an advocate of polystyrene cement, I would become one as a result of this, since I would run out of skin on my thumb after a single session. Then mark out and cut out a section of 0.5mm thick plasticard which is 15mm by 20mm.
Glue that into the gap thus, and you have your side hatch. Now cut out a pair of small pieces of 2.4mm diameter plasticard tube, unless you have some spare Imperial Guard handles.
Glue them onto the hatch about 5mm apart - unless you have spare handles, as I say. Then get some thin plasticard rod. I am using 0.75mm here, but have used 1mm before. Cut four pieces a few millimetres long.
Glue them into place as hinges for the hatch. Then get yourself a lot of rivets (I use thinly sliced pieces of 1mm plasticard rod), drip a small puddle of glue onto a coin or other surface which the glue will not react with. Now gently press your knife into each rivet, dip it in the puddle, and glue it to the surface. If you find you have too much glue, then you can gently touch the rivet's glue blob to the surface, leaving some glue for the next rivet, which now does not require dipping any more. Stick some music or the TV on for this step, as it takes a while!
The handle for the hatch still needs to be applied, but I find that it is best to wait several hours so that it does not pull out the holders. I'll edit that piece in later. But this is all but complete.
First, get your equipment together. You will need the same as last time (knife, plastic ruler, metal ruler, sharp pencil, file) and three new additions: polystyrene cement, scissors and a hole punch. Instead of the 2mm thick plasticard used to create the side, you will instead want plasticard that's about 0.5mm thick.

Oops, forgot the scissors. First, cut yourself a strip 20mm wide from the 0.5mm thick plasticard. Aim for this to be a little over twice as long as the side you want to detail.

Place the side you made earlier over the plasticard strip you just made and draw around the curves at front and back.

Leave a little under a centimetre in case of mistakes, and with your scissors cut the marked portion off the strip. Put the remainder of the strip aside for later.

Ensure that the marked strip is close to the dimensions of the larger piece, then with your scissors cut off the surplus plasticard. Remember still to leave a bit of space outside the boundaries so that you can fiddle later. Now get your ruler and pencil. First, draw a line dividing your 20mm strip into two 10mm portions, one upper and one lower. Make no cuts yet. Then divide the lower 10mm into two 5mm strips with another line. Then mark a point on the upper line, that which divides the plasticard into two 10mm strips. It should be about 7mm in from where your original pencil marking tells you the end will be. Mark a similar point about 7mm in along the top edge of the plasticard strip and connect them with a line. Then make a series of markings on the 10mm and 5mm dividing lines as shown in this picture. They should alternate 10mm and 5mm thus.

Now carefully cut off the 5mm portions and the large upper portion, until you are left with this.

Then trim the corners off the corners of the blocks marked ten. You can measure this, but I tend to eyeball it.

Right, you're almost there! Now just apply glue to the back of it and line it up on the side of the big piece of 2mm plasticard thus. Note that there will still be overhang. Do not trim this yet. You must wait until the glue is properly set.

Now we leave the lower part for a time, and move to the upper part. Recover the remaining piece of 20mm which you earlier set aside and divide it thus. However, where I have written 35, you will probably prefer to measure 40mm instead, as on my finished example it looks a tad too small.

Cut away the marked pieces until you are left with this.

Now glue this onto the upper half of the side of your tank. By this time the lower portion should be secure, so you can now trim away with your scissors or knife, then file the corners smooth, and carefully remove the fluff with your knife.

Now find some scrap plasticard of 0.5mm thickness. Use your holepunch to make seven circles, and collect them from the holepunch's storage pocket. Press your thumb against them to flatten them out a little. See how the rightmost one is flatter than the others.

Put a small dab of glue beneath each one and use your thumb to press it on firmly. Incidentally, if I were not already an advocate of polystyrene cement, I would become one as a result of this, since I would run out of skin on my thumb after a single session. Then mark out and cut out a section of 0.5mm thick plasticard which is 15mm by 20mm.

Glue that into the gap thus, and you have your side hatch. Now cut out a pair of small pieces of 2.4mm diameter plasticard tube, unless you have some spare Imperial Guard handles.

Glue them onto the hatch about 5mm apart - unless you have spare handles, as I say. Then get some thin plasticard rod. I am using 0.75mm here, but have used 1mm before. Cut four pieces a few millimetres long.

Glue them into place as hinges for the hatch. Then get yourself a lot of rivets (I use thinly sliced pieces of 1mm plasticard rod), drip a small puddle of glue onto a coin or other surface which the glue will not react with. Now gently press your knife into each rivet, dip it in the puddle, and glue it to the surface. If you find you have too much glue, then you can gently touch the rivet's glue blob to the surface, leaving some glue for the next rivet, which now does not require dipping any more. Stick some music or the TV on for this step, as it takes a while!

The handle for the hatch still needs to be applied, but I find that it is best to wait several hours so that it does not pull out the holders. I'll edit that piece in later. But this is all but complete.

Bit strange, this. Apparently this has been sitting in the Draft section of my blog for two years without me realising it. I suppose I forgot to hit Publish back then!
ReplyDelete