Showing posts with label Tutorial. Show all posts
Saturday, 5 November 2016
Hedgerows for 6mm
Rooting through some boxes (and failing to find where I have securely stored my weathering powders), I unearthed some tongue depressors I bought from Hobbycraft a while ago. They're 6" (15cm) in length, and 3/4" (18mm) across, so they're a great size for all sorts of things. I used them recently as the bases for 28mm walls and fences. Clearly, 6mm terrain doesn't need to be so tall as 28mm or even 15mm, so I just did the simplest thing possible. I applied UHU to the wood to prevent warping, then used PVA atop that to glue and secure sand. I painted over that with dark brown paint, then gave it a light drybrush of a coffee colour, then a lighter one yet of white. Then I used the UHU again to glue three colours of clump foliage onto the top. I tried to mix them up and keep them irregular in appearance. Simple as anything, and now I have 6' of hedgerows for 6mm.
Labels:
Hedges,
Scratchbuilding,
Terrain,
Tutorial
Wednesday, 2 November 2016
Ruined adobe buildings for 28mm
Intention
Having made a bunch of adobe buildings for Middle Eastern/American/SF use, I wanted to round them out with a few abandoned ruined structures. Maybe the settlement fell on hard times as a result of the depredations of Space Calvera. Perhaps, as was formerly the case in Greece, incomplete buildings are not taxed. It used to be quite a striking feature of Greece, that: perfectly habitable (and inhabited) buildings with a notionally incomplete upper floor. Hardly the Parthenon, I agree.
Beginnings
I carved a few bases from cake board (£1 from my local pound shop), two small buildings and one mid-sized. I bevelled the edges, and coated them with a layer of UHU. Not coating them would have meant they'd have been warped later on. With some polystyrene offcuts and some foamboard, I created the perimeters of the buildings, gluing everything together with the hot glue gun. I put in a little rubble (not enough to impede the occupation of the buildings by soldiery) and something in the way of tall grass. I coated this all with dilute filler (hence the earlier application of UHU to the bevelled edges).
Painting
I applied a coat of the same cream paint I've been using since c. 2003, and suddenly realised I was on the brink of running out. Improvisation! So I applied some dilute washes of brown and black around the edges of the walls and on the walls themselves. Once they were dry, I began drybrushing the walls in progressively lighter shades, working my way up to white.
Finishing Touches
With the painting completed, I went a bit crazy with the flock. These dwellings were clearly abandoned a while back as the greenery (and brownery) suggests. I'm pleased with how these turned out, particularly the very exposed vantage point at the top of the stairs. Now I just need to find some paint to last me the next decade and a quarter.
Labels:
28mm,
Pound Stores,
Scratchbuilding,
Star Wars,
Terrain,
Tutorial,
Wild West
Monday, 24 October 2016
Fences a la The Terrain Tutor
Fences
I already have something like twelve feet (3.6m) of fences for 28mm, so why make more? Well, simply put, because the ones Mel makes look a lot nicer than the ones I already had. Besides, who doesn't need 16 foot of model fencing? I can almost feel teh Battle of Farmville approaching.
How to make the fences
If you want to make something like this, I can do no better than direct you to the scenery wizard who inspired me, The Terrain Tutor. He's a top bloke, whose dream is to teach everyone how to make gorgeous terrain for their games. He has all sorts of tutorials on there. If you haven't checked him out already, do so now!
Here is the link to his Youtube channel.
Here is the link to his tutorial on fences.
Here's how mine turned out
Labels:
Scratchbuilding,
Terrain,
Tutorial
Thursday, 31 March 2016
Terrain Tutorial: "Glass" Windows
I am using these for my "Mosque", but they can work in any building. Find yourself an old transparent CD case, then get yourself a sharp knife, a ruler, some pliers and some strong glue (I used Evo-Stik Impact; having experimented with superglue and drawn a blank). It is usually easiest to trim the raised bits off the CD case, so you have a nice, flat piece of plastic. Measure how much plastic you need to cover your window area. If you have several windows to cover, you may find it easier, as I have here, to cut one big piece for them all. Check your plastic is flat by carefully running the edge of your blade around the perimeter of your piece. Do be careful. Apply glue to the model, and lower the glass onto it. Take care not to get glue onto your window. Weigh it down and wait for the glue to dry. Note that I intend to apply some printed paper to the inside of the window panes, simulating leaded glass. If you're going to have open windows, be sure to have something inside to look at. If you are going to make the interior accessible, then you should also hide the window mounting. I may do a further tutorial on that, but not today.
Labels:
Scratchbuilding,
Terrain,
Tutorial,
Windows
Friday, 4 March 2016
Terrain Tutorial: Build your own village
Nothing could be simpler than knocking up an adobe village. Even better, provided you minimise the detailing, they're suitable for all sorts of locations: the Middle East, Mexico and the south-easterly portions of the USA, even the desert planet Tatooine.
Requirements:
Foamcard
Long pins
PVA glue
Superglue
Balsa wood
Rulers
Pencil
Sharp knife
Suitable paints
Paintbrushes, including a quite large one (a 1" brush is a good size)
Filler
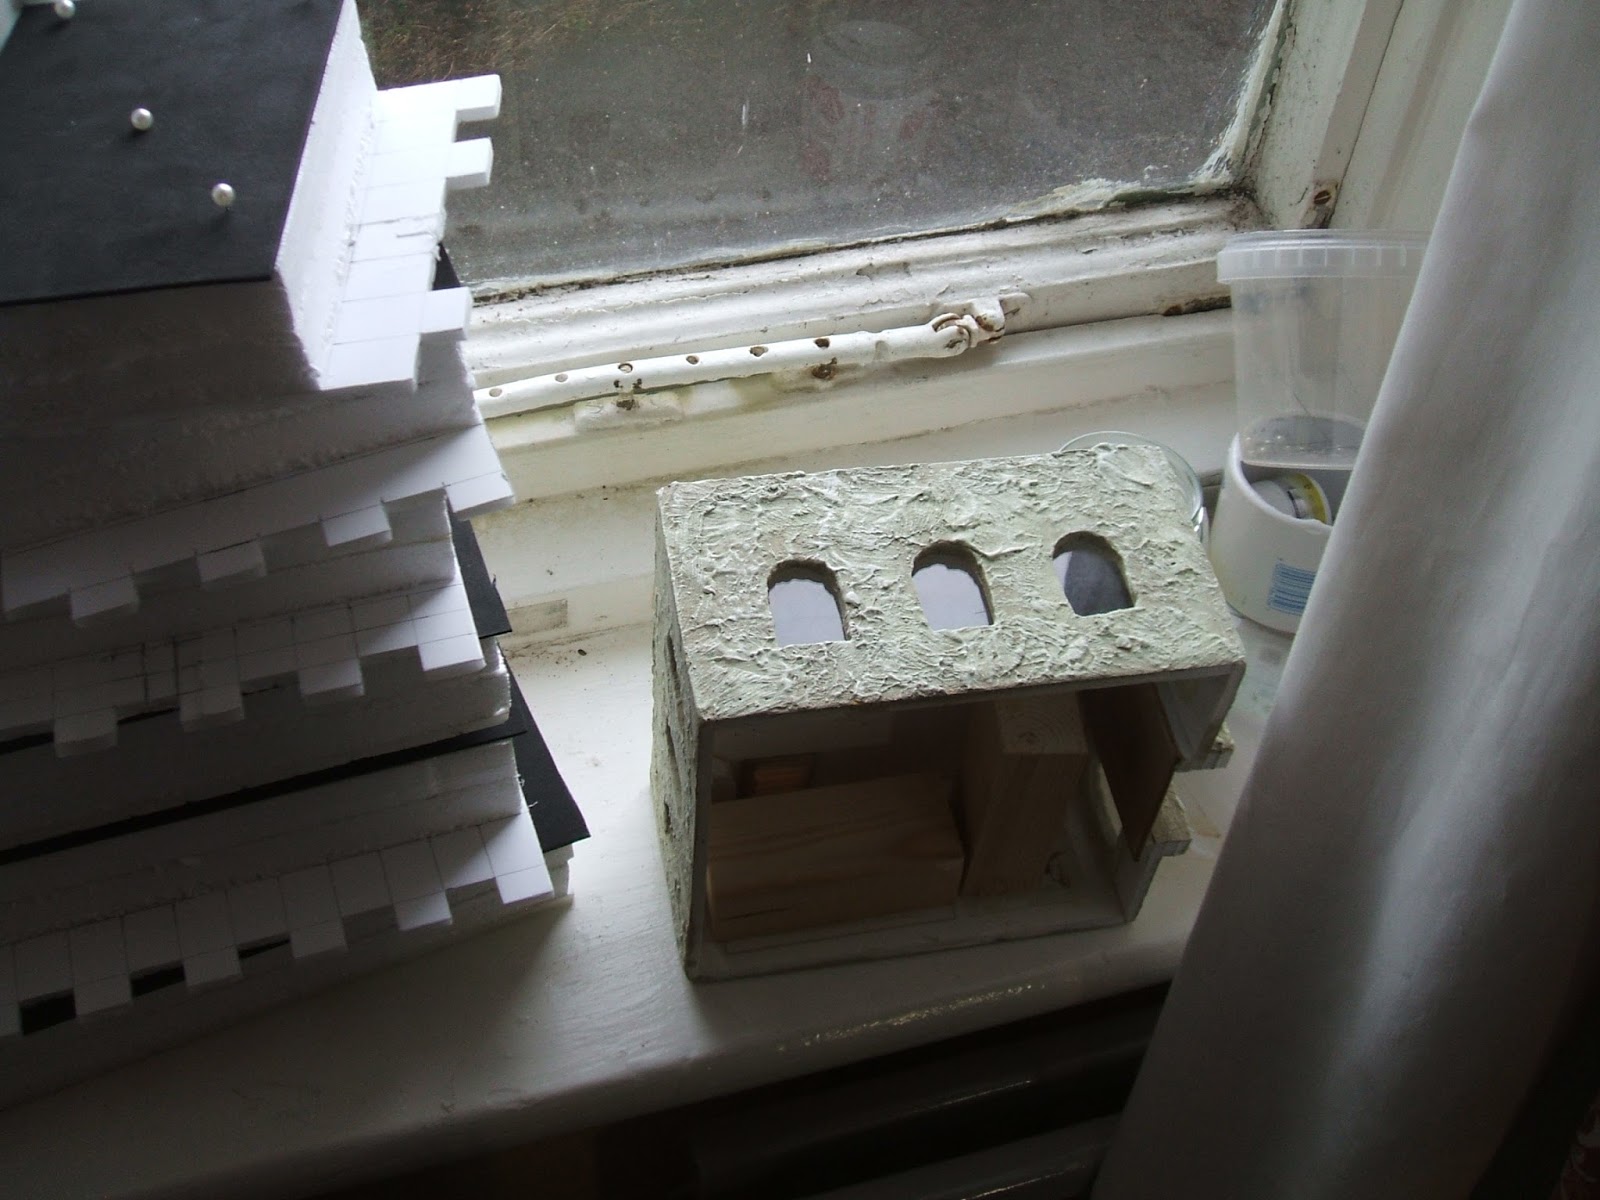
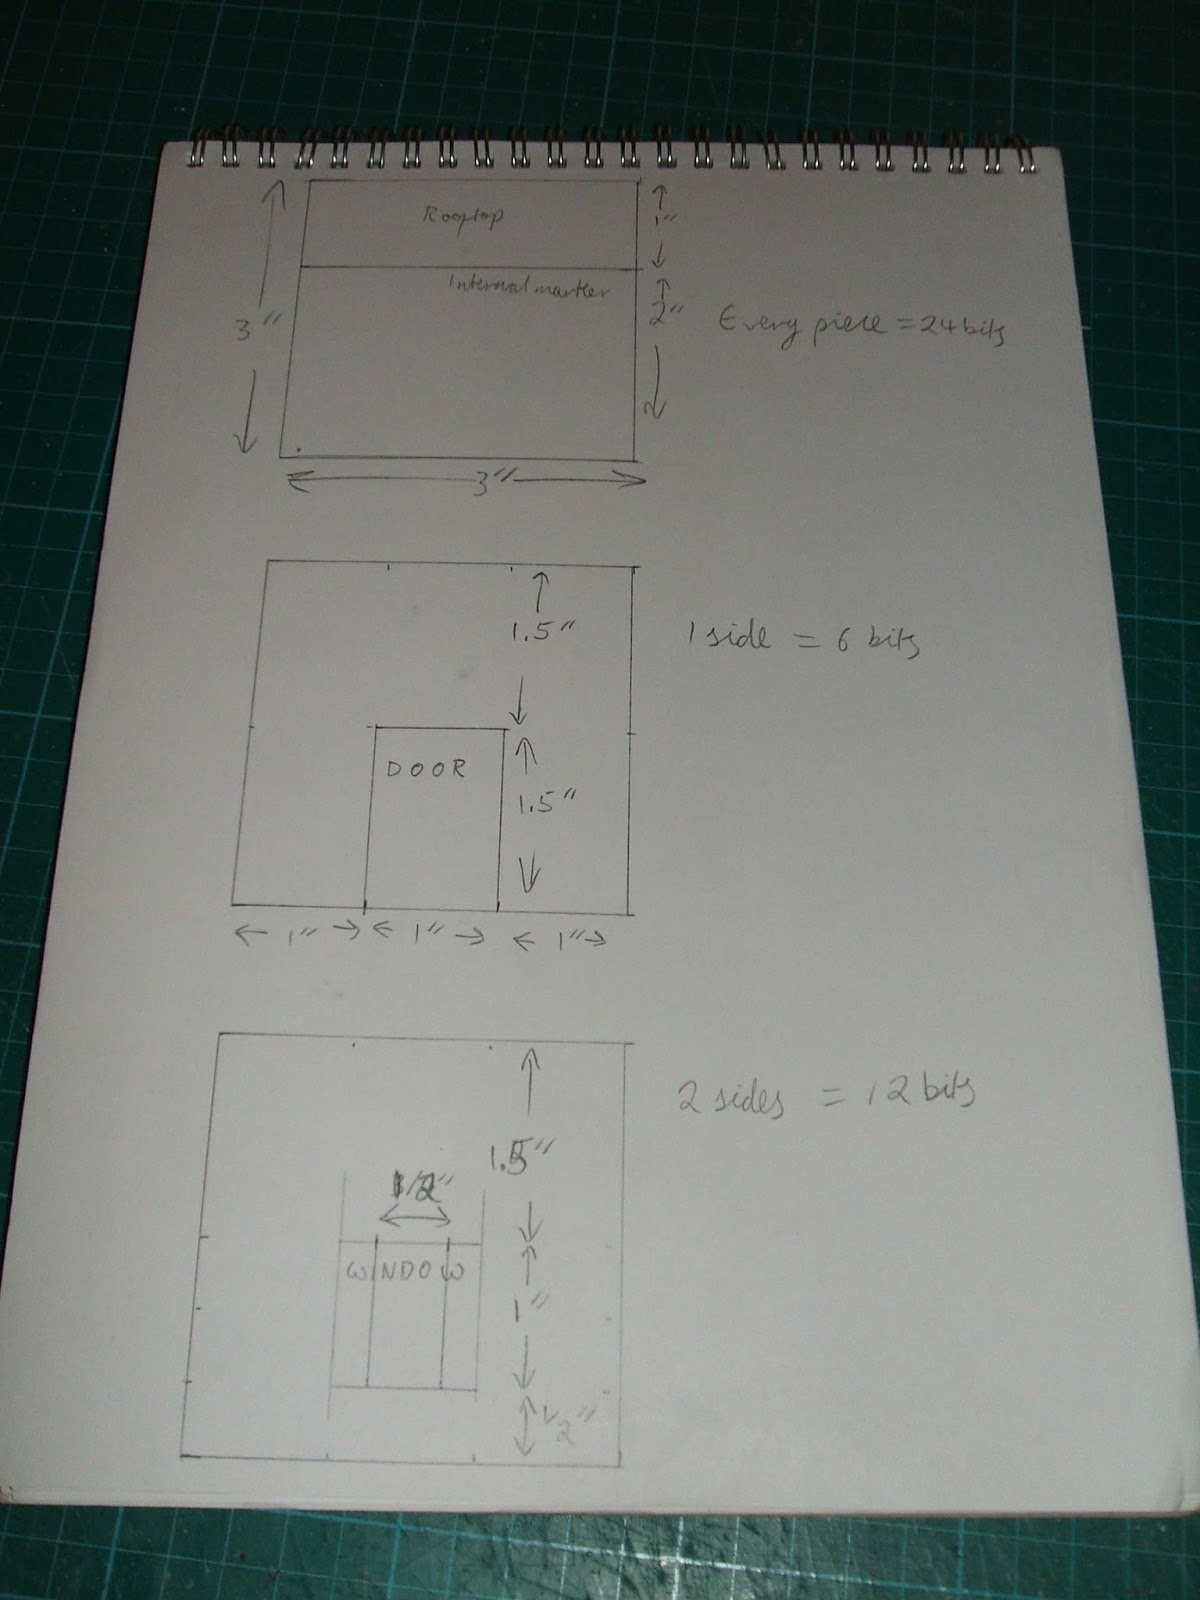
Decide how large you want your buildings to be. I decided to give most of mine a 3" (76mm) by 3" footprint on the table, and then make a few slightly larger ones for variety. I drew some 1:1 plans on an A4 pad (Fig. 1) and set to work. I carved out all the side pieces (leaving out the roofs for now), including doors, which I decided would be an inch (25mm) wide and an inch and a half (38mm) high. Owing to the size of the buildings, I elected to have windows on doors on different walls. I also marked out one inch from the top of the walls so I could place the roof there later (Figs. 2-4). After construction, I ran across another tutorial which recommended carving out a 5mm strip at the end of the wall, allowing pieces to abut very tidily. I have since tried it and commend it to you. It means less work when applying filler to hide the joins later.
When carving out your doors and windows, do not throw away the offcuts. Retain them. Line up your corners, painting some PVA on the adjoining segments, and then pin them together. Do not worry if the pieces are of slightly different heights, but do your best to ensure that the bottoms of the walls are level so that the completed dwellings will sit flat on your table. Once the walls are pinned together, take those offcuts you saved, and pin them into three corners of every four, where they will support the floor you will add later (Figs. 5 & 6).
I chose to make two slightly larger and different buildings here to add to the character of the settlement. I gave one a 4" (102mm) long back wall, and the other a 4" (102mm) long front and 5" (127mm) long back wall. In both cases I cut a strip of 1" (25mm) wide foamcard and then cut it into pieces to form an external staircase. I recommend decreasing the strips of steps as they are stacked by 1/4" (6mm) for a good appearance, e.g. if the lowest strip was 76mm long, the second should be 70mm, and so on. As before, apply PVA glue and secure the pieces with pins (Figs.7 & 8).
Let everything dry overnight, then remove the pins. Twist them through a complete circle in order to break the glue's hold on them so you can remove them easily. Round off the sharp edges of the buildings with a sharp knife. Create some damaged sections for verisimilitude. Remove some of the paper covering, and carve bricks into the exposed foam. Make some roofs to fit the buildings, and carve a 20mm by 20mm square close to one corner unless the building has an external staircase. As before, glue and pin in place, leave to dry, and remove the pins when dry (Figs. 9-11).
Mark on balsa sheet your doors, windows. Remember to make them large enough to overlap the door-frames and windows. Using a ruler and pencil, score them to suggest planking (you may need to repeat this after staining), then dye them with diluted paints. This gives an initial suggestion that the wood is sun-bleached (Fig. 12). I chose to stain each building's wood differently. Do not worry if some pieces are more strongly stained than others as it is what happens in reality. Once dry drybrush with a colour to suggest the wood is weather-beaten. I used a cream.
Mix up some filler and apply it with the large brush across the building to provide some texture, taking care not to obscure the brick detail you have scribed in place. Once this has dried, repeat the procedure, applying the filler only on the pieces of wall not scribed with brickwork. Wait for this to dry, then paint the buildings in your choice of colours. I mixed a brown with a cream, and used that for my base coat. I applied a heavy drybrush of cream over that, and a final lighter drybrush of white. Some of the filler had dripped into the buildings, so I carefully removed that at that point. Then I applied superglue around the insides of the doorways, windows and roof hatches, and glued the differently stained and drybrushed woods in place.
And you're done! Enjoy your village. Note in Figs. 9-11 the larger building with the domed roof. Look out for a feature on that building shortly. The general principles are similar to these buildings.
Requirements:
Foamcard
Long pins
PVA glue
Superglue
Balsa wood
Rulers
Pencil
Sharp knife
Suitable paints
Paintbrushes, including a quite large one (a 1" brush is a good size)
Filler
Decide how large you want your buildings to be. I decided to give most of mine a 3" (76mm) by 3" footprint on the table, and then make a few slightly larger ones for variety. I drew some 1:1 plans on an A4 pad (Fig. 1) and set to work. I carved out all the side pieces (leaving out the roofs for now), including doors, which I decided would be an inch (25mm) wide and an inch and a half (38mm) high. Owing to the size of the buildings, I elected to have windows on doors on different walls. I also marked out one inch from the top of the walls so I could place the roof there later (Figs. 2-4). After construction, I ran across another tutorial which recommended carving out a 5mm strip at the end of the wall, allowing pieces to abut very tidily. I have since tried it and commend it to you. It means less work when applying filler to hide the joins later.
When carving out your doors and windows, do not throw away the offcuts. Retain them. Line up your corners, painting some PVA on the adjoining segments, and then pin them together. Do not worry if the pieces are of slightly different heights, but do your best to ensure that the bottoms of the walls are level so that the completed dwellings will sit flat on your table. Once the walls are pinned together, take those offcuts you saved, and pin them into three corners of every four, where they will support the floor you will add later (Figs. 5 & 6).
I chose to make two slightly larger and different buildings here to add to the character of the settlement. I gave one a 4" (102mm) long back wall, and the other a 4" (102mm) long front and 5" (127mm) long back wall. In both cases I cut a strip of 1" (25mm) wide foamcard and then cut it into pieces to form an external staircase. I recommend decreasing the strips of steps as they are stacked by 1/4" (6mm) for a good appearance, e.g. if the lowest strip was 76mm long, the second should be 70mm, and so on. As before, apply PVA glue and secure the pieces with pins (Figs.7 & 8).
Let everything dry overnight, then remove the pins. Twist them through a complete circle in order to break the glue's hold on them so you can remove them easily. Round off the sharp edges of the buildings with a sharp knife. Create some damaged sections for verisimilitude. Remove some of the paper covering, and carve bricks into the exposed foam. Make some roofs to fit the buildings, and carve a 20mm by 20mm square close to one corner unless the building has an external staircase. As before, glue and pin in place, leave to dry, and remove the pins when dry (Figs. 9-11).
Mark on balsa sheet your doors, windows. Remember to make them large enough to overlap the door-frames and windows. Using a ruler and pencil, score them to suggest planking (you may need to repeat this after staining), then dye them with diluted paints. This gives an initial suggestion that the wood is sun-bleached (Fig. 12). I chose to stain each building's wood differently. Do not worry if some pieces are more strongly stained than others as it is what happens in reality. Once dry drybrush with a colour to suggest the wood is weather-beaten. I used a cream.
Mix up some filler and apply it with the large brush across the building to provide some texture, taking care not to obscure the brick detail you have scribed in place. Once this has dried, repeat the procedure, applying the filler only on the pieces of wall not scribed with brickwork. Wait for this to dry, then paint the buildings in your choice of colours. I mixed a brown with a cream, and used that for my base coat. I applied a heavy drybrush of cream over that, and a final lighter drybrush of white. Some of the filler had dripped into the buildings, so I carefully removed that at that point. Then I applied superglue around the insides of the doorways, windows and roof hatches, and glued the differently stained and drybrushed woods in place.
And you're done! Enjoy your village. Note in Figs. 9-11 the larger building with the domed roof. Look out for a feature on that building shortly. The general principles are similar to these buildings.
Wednesday, 24 February 2016
Terrain Tutorial: Mausoleum - Part 2
I'm having the week off work. Usually, this would allow me to get a lot done. However, I accurately predicted that the cold which has lain low friends and family (and perfect strangers) for weeks on end would get me. Luckily for you, I finished the Mausoleum several days ago.
In case you missed the first half, it's here. As before, the pictures here are labelled 1-2, so even if Blogger decides to hide or lose them, you should be able to follow the narrative. I seem to have forgotten to photograph the work on the doors, but they are easy to describe. I cut a rectangle of 1mm thick plasticard, and cut a rectangle out from it, leaving a lip of 5mm. Inside I placed some balsa, trimmed to size, and scribed it to make it seem like a double door. I inserted those brass pins you used to find securing collections of papers in aeons gone by. I ought to have paid closer attention, as I later realised they were not symmetrical. Oops.
Right, next I got to work on making a pediment for the tomb. To be on the safe side, I cut some paper templates first, and then, having decided they were the right size, duplicated them in plasticard. I used 2mm thick plasticard for the triangular structure. You can see the measurements (in millimeters) marked on the pieces in Pics. 1-3. I used small bits of Lego as internal supports to ensure sturdy right angles. The Lego was secured with superglue, the plasticard with polystyrene cement.
I'd decided the pillars needed a little something at the bottom, so I cut out small square bases for them from balsa, gluing the bases to the original balsa, then the columns to them and the face of the building, framing the doorway. I cut the handle off the reverse of a Lego shield, and added it in the middle of the pediment to break up the empty space. Pics. 4-5.
I applied dilute filler over most of the building (not the doors) to give some surface texture, then undercoated it all in blue. I would continue to use small bit of blue in the painting to suggest cold. This was mentioned in the original magazine article that inspired me to make this piece. Then I applied a layer of blue-grey. Pics. 6-8. When I came to detail the stonework, I discovered that my filling and painting had rendered nearly invisible the delineations between bricks and slabs, and so used some blue ink to reverse that. The doors got a reddish brown, and a couple of coats of washes, while the brass elements had brass, green washes and gold drybrushes. I painted the ground dark brown, and added a few patches of grass, as though plants were just starting to recolonise the lost city after the thaw. Pics. 9-12. A Great War Miniatures British officer is present for scale. I hope you found this tutorial useful.
In case you missed the first half, it's here. As before, the pictures here are labelled 1-2, so even if Blogger decides to hide or lose them, you should be able to follow the narrative. I seem to have forgotten to photograph the work on the doors, but they are easy to describe. I cut a rectangle of 1mm thick plasticard, and cut a rectangle out from it, leaving a lip of 5mm. Inside I placed some balsa, trimmed to size, and scribed it to make it seem like a double door. I inserted those brass pins you used to find securing collections of papers in aeons gone by. I ought to have paid closer attention, as I later realised they were not symmetrical. Oops.
Right, next I got to work on making a pediment for the tomb. To be on the safe side, I cut some paper templates first, and then, having decided they were the right size, duplicated them in plasticard. I used 2mm thick plasticard for the triangular structure. You can see the measurements (in millimeters) marked on the pieces in Pics. 1-3. I used small bits of Lego as internal supports to ensure sturdy right angles. The Lego was secured with superglue, the plasticard with polystyrene cement.
I'd decided the pillars needed a little something at the bottom, so I cut out small square bases for them from balsa, gluing the bases to the original balsa, then the columns to them and the face of the building, framing the doorway. I cut the handle off the reverse of a Lego shield, and added it in the middle of the pediment to break up the empty space. Pics. 4-5.
I applied dilute filler over most of the building (not the doors) to give some surface texture, then undercoated it all in blue. I would continue to use small bit of blue in the painting to suggest cold. This was mentioned in the original magazine article that inspired me to make this piece. Then I applied a layer of blue-grey. Pics. 6-8. When I came to detail the stonework, I discovered that my filling and painting had rendered nearly invisible the delineations between bricks and slabs, and so used some blue ink to reverse that. The doors got a reddish brown, and a couple of coats of washes, while the brass elements had brass, green washes and gold drybrushes. I painted the ground dark brown, and added a few patches of grass, as though plants were just starting to recolonise the lost city after the thaw. Pics. 9-12. A Great War Miniatures British officer is present for scale. I hope you found this tutorial useful.
Labels:
Frostgrave,
Painting,
Scratchbuilding,
Terrain,
Tutorial
Wednesday, 17 February 2016
Terrain Tutorial: Mausoleum - Part 1
Tools and Equipment:
Foamboard/foamcore/foamcard
Balsa wood
Something to use as a base - part of my bed needed replacing last year, so I have some wood left over from the damaged portion
Decorative bits and bobs
EVA foam (I ordered mine from Amazon, though have since found it in a store called Hobbycraft)
Cylinders suitable for use as columns (I used the plastic innards of the rolls of paper used in credit card machines)
Balsa wood
Assorted glues (PVA, superglue, EVO-stik)
Pencil
Stanley Knife or other sharp blade
Ruler(s) - preferably steel so you won't slice through it/them by mistake
Plasticard
Half a large Christmas bauble or hemisphere of some other kind
Cardboard
Decorative wood
Pins
A Lego shield
Paints
Sand
Clamps/vices
Introductory note: Blogger does a wonderful job of rearranging pictures and sometimes even removing them. For your convenience I have numbered the attached pictures 1-11, so even if they go astray or end up back to front, you can tell which one I mean.
First, lay out your base and make sure you have plenty of room for your building. I wanted to allow a large enough lip around mine for models to stand on. I also wanted to make it large enough to have a distinct presence on the tabletop. My base was about 10" (25cm) square, so I decided to make the building about 7" (17.8cm) on each side. That's an approximate measurement because I had some offcuts of decorative wooden stuff from B&Q (from about 15 years back, but which is still available as of my last visit there last week), which I fancied would look good on the sides.
Second, cut out your foamcard. I ran a little short during this phase, and ended up making some of the front of the building from balsa wood. Plan ahead so this doesn't happen to you! I made it 3" tall so it would loom over most models. Having made the essential box shape of the building, I started work on the one side without the wood, the front. I want ed some nice columns here, flanking the door, and a pediment for them to stand on. I measured carefully to ensure they would be symmetrical. Figs. 1-3.
Having done that I wanted to get a good visual notion in my head of the shape of the finished building, so upended a handy empty box of tissues, and popped the hemisphere atop it, balancing the "columns" in place on their pediments. Figs. 4-6. Pleased that the image confirmed my mental image, I continued, boxing the building in with balsa, and placing an EVA foam layer above that. Figs. 7-8. I had heard of EVA foam as a great thing to use for paving and so on, and so it proved. Though the paint did tend to fill in the scribed marks I made with a pencil to resemble flagstones and cracks. I dealt with that by applying a diluted wash, but we shall come to that later.
I wanted the option for figures to manoeuvre around the roof of the building, so ensured an inch (25mm) between the edge of the building and another walled section 1.5" (38mm) in height. Having run out of foamcard at this point, I created a box from balsa (not the best of materials for this, as it kept wanting to fall down as I glued the EVA to it later). Over the course of a few days (owing to the fragility of the balsa) I glued the EVA to the wood in stages, one flat side at a time. I used a vice to do this, and because it would have marked the foam, I folded up a sheet of A4 paper on either side of the vice, preventing it from doing so. Then I blocked in the roof with cardboard, and applied the dome to the top of the roof. Figs. 9-11.
Stay tuned for Part II next Wednesday!
Foamboard/foamcore/foamcard
Balsa wood
Something to use as a base - part of my bed needed replacing last year, so I have some wood left over from the damaged portion
Decorative bits and bobs
EVA foam (I ordered mine from Amazon, though have since found it in a store called Hobbycraft)
Cylinders suitable for use as columns (I used the plastic innards of the rolls of paper used in credit card machines)
Balsa wood
Assorted glues (PVA, superglue, EVO-stik)
Pencil
Stanley Knife or other sharp blade
Ruler(s) - preferably steel so you won't slice through it/them by mistake
Plasticard
Half a large Christmas bauble or hemisphere of some other kind
Cardboard
Decorative wood
Pins
A Lego shield
Paints
Sand
Clamps/vices
Introductory note: Blogger does a wonderful job of rearranging pictures and sometimes even removing them. For your convenience I have numbered the attached pictures 1-11, so even if they go astray or end up back to front, you can tell which one I mean.
First, lay out your base and make sure you have plenty of room for your building. I wanted to allow a large enough lip around mine for models to stand on. I also wanted to make it large enough to have a distinct presence on the tabletop. My base was about 10" (25cm) square, so I decided to make the building about 7" (17.8cm) on each side. That's an approximate measurement because I had some offcuts of decorative wooden stuff from B&Q (from about 15 years back, but which is still available as of my last visit there last week), which I fancied would look good on the sides.
Second, cut out your foamcard. I ran a little short during this phase, and ended up making some of the front of the building from balsa wood. Plan ahead so this doesn't happen to you! I made it 3" tall so it would loom over most models. Having made the essential box shape of the building, I started work on the one side without the wood, the front. I want ed some nice columns here, flanking the door, and a pediment for them to stand on. I measured carefully to ensure they would be symmetrical. Figs. 1-3.
Having done that I wanted to get a good visual notion in my head of the shape of the finished building, so upended a handy empty box of tissues, and popped the hemisphere atop it, balancing the "columns" in place on their pediments. Figs. 4-6. Pleased that the image confirmed my mental image, I continued, boxing the building in with balsa, and placing an EVA foam layer above that. Figs. 7-8. I had heard of EVA foam as a great thing to use for paving and so on, and so it proved. Though the paint did tend to fill in the scribed marks I made with a pencil to resemble flagstones and cracks. I dealt with that by applying a diluted wash, but we shall come to that later.
I wanted the option for figures to manoeuvre around the roof of the building, so ensured an inch (25mm) between the edge of the building and another walled section 1.5" (38mm) in height. Having run out of foamcard at this point, I created a box from balsa (not the best of materials for this, as it kept wanting to fall down as I glued the EVA to it later). Over the course of a few days (owing to the fragility of the balsa) I glued the EVA to the wood in stages, one flat side at a time. I used a vice to do this, and because it would have marked the foam, I folded up a sheet of A4 paper on either side of the vice, preventing it from doing so. Then I blocked in the roof with cardboard, and applied the dome to the top of the roof. Figs. 9-11.
Stay tuned for Part II next Wednesday!
Labels:
Frostgrave,
Scratchbuilding,
Terrain,
Tutorial
Subscribe to:
Posts (Atom)