Showing posts with label Painting. Show all posts

Saturday, 7 January 2017

Native huts: Part 2 - painting

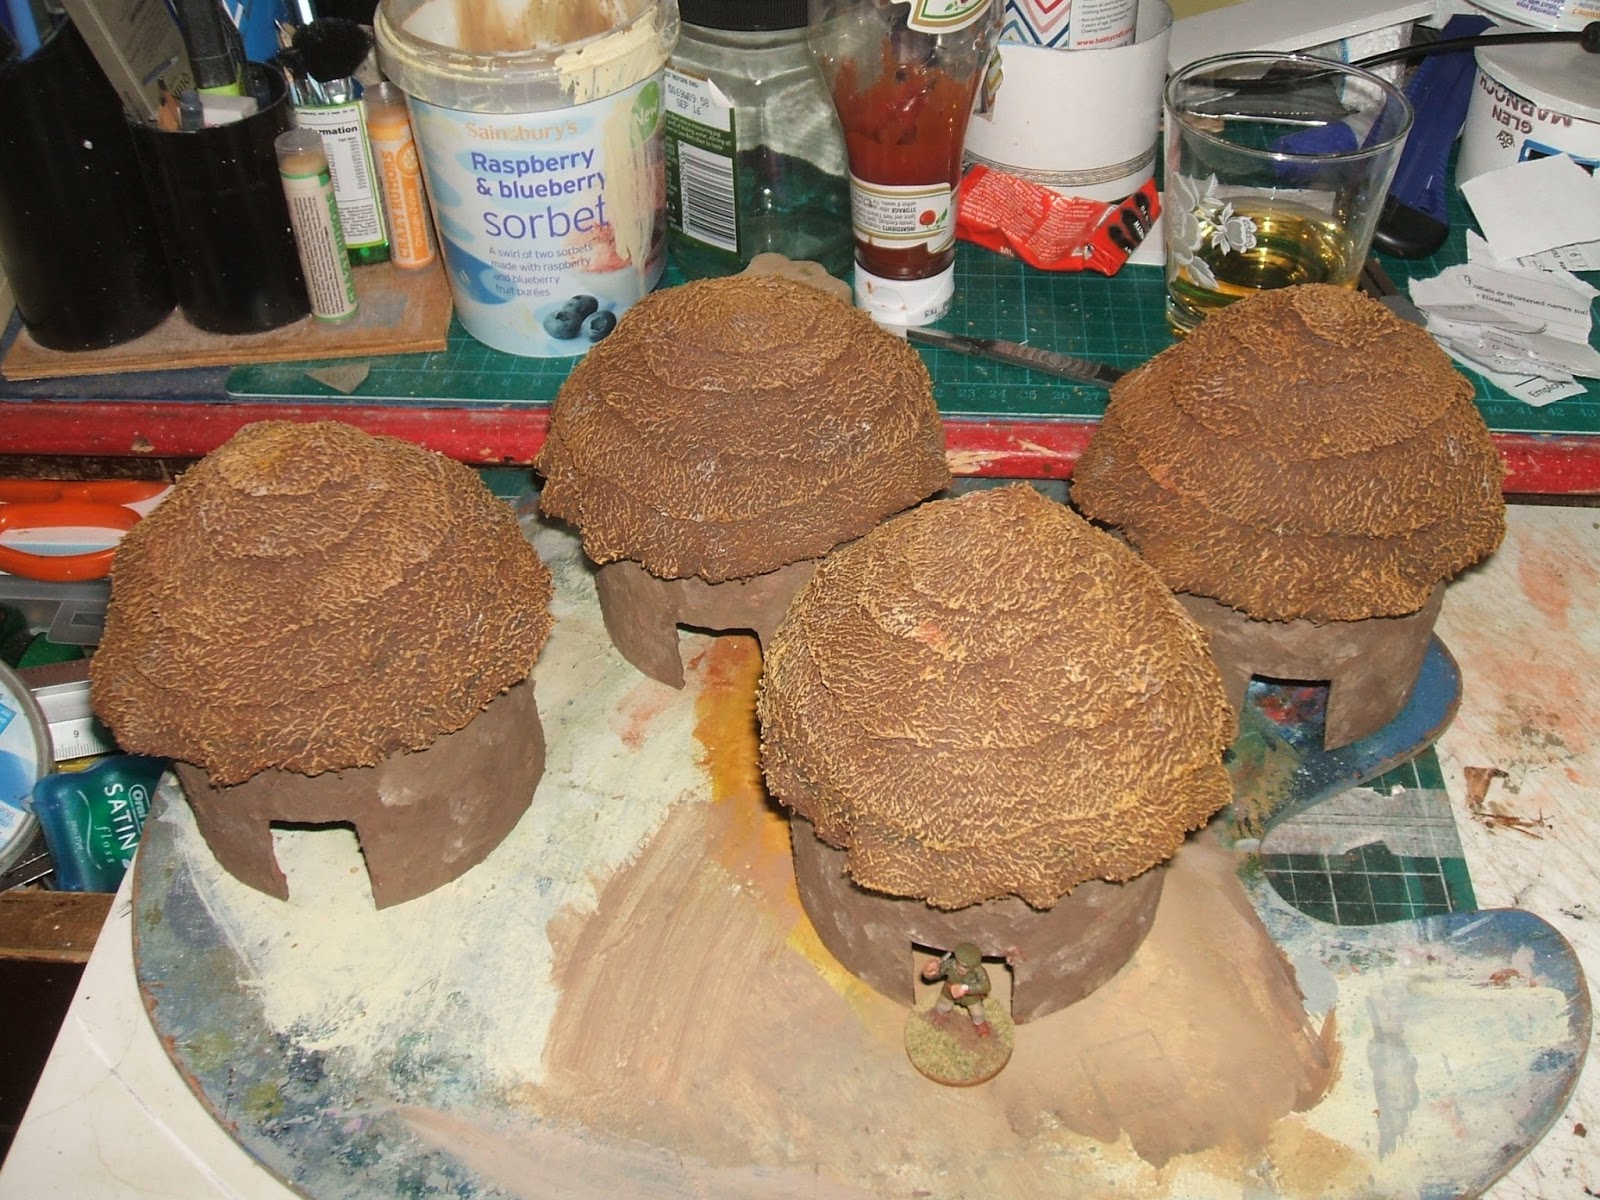
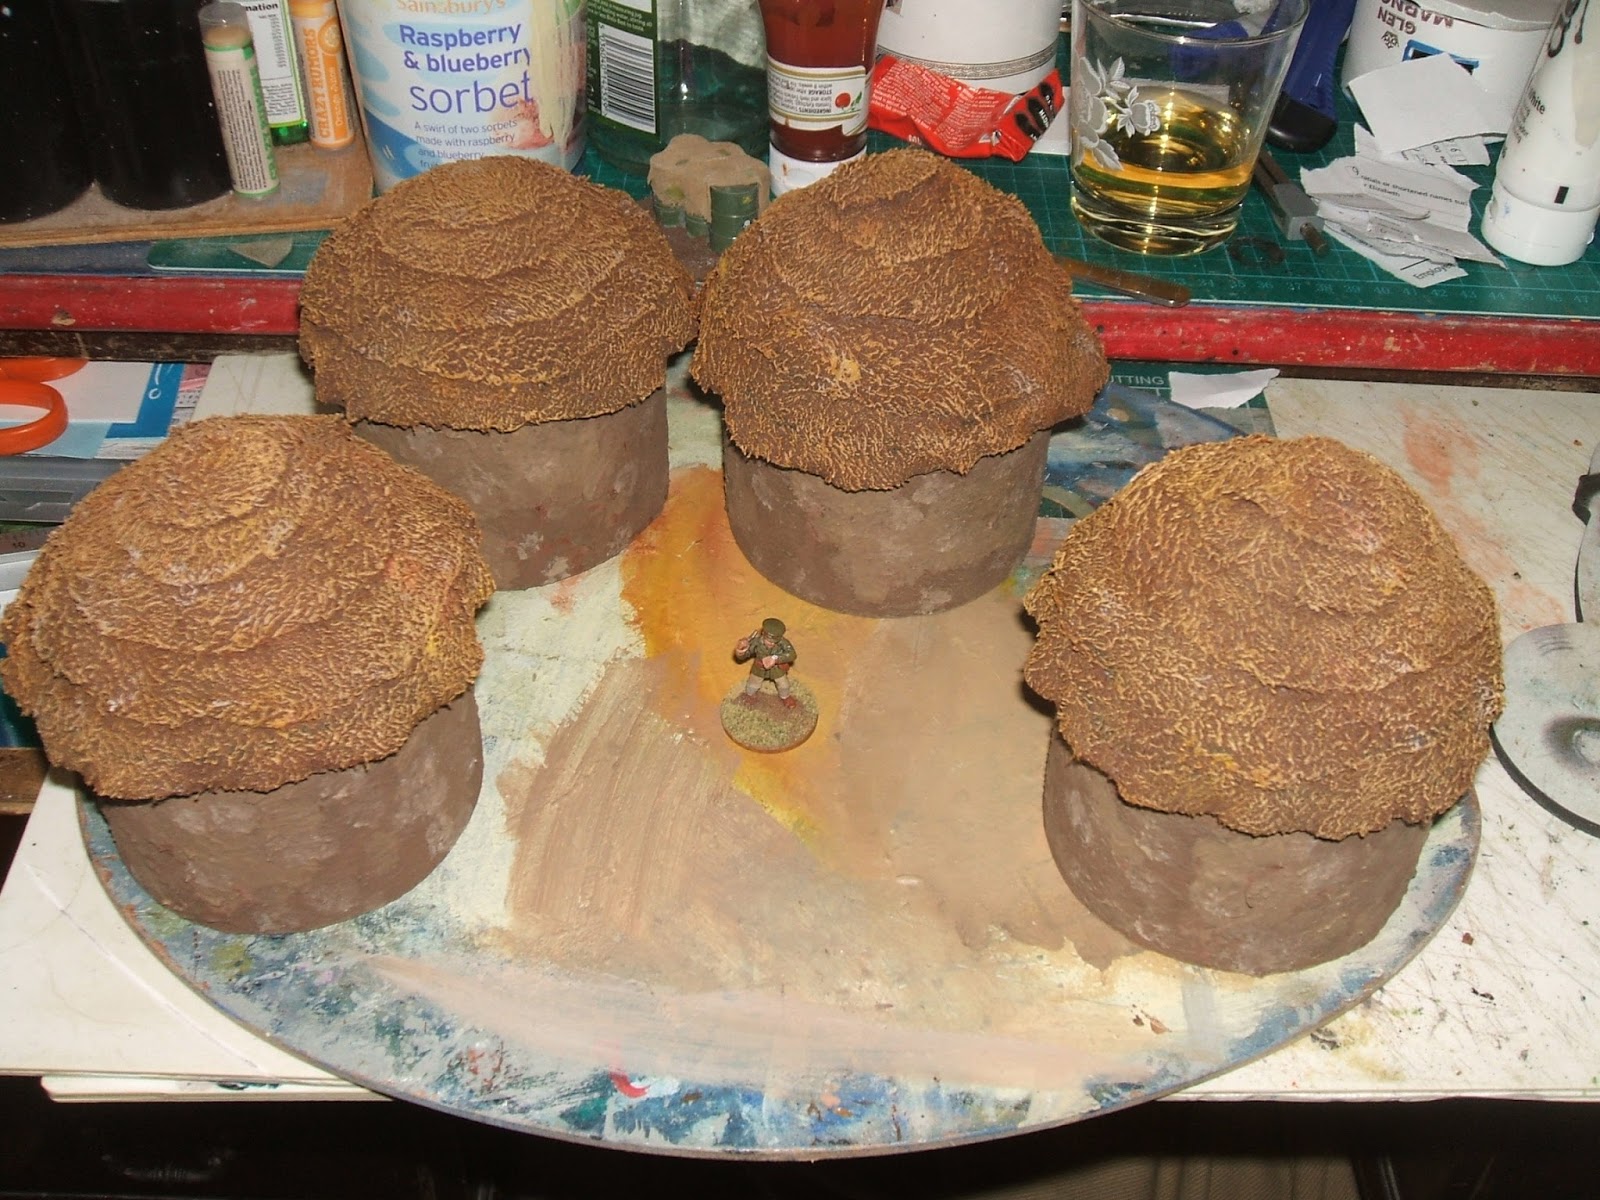
Happily, the solution I came up with of cutting the towel into circles worked pretty well. I'm not quite happy with the droop on the lowest circle, but I can bear it. I undercoated everything with some Halford's brown gloss spray paint. I think the aforementioned article in Wargames Illustrated #350 notes the irritation of trying to paint a base colour onto towel by hand! With the roofs, I went for a golden-orange range of tones for the straw, usually doing some drybrushing downward, but also sweeping around, too. For the walls I stippled on a span of dirty creams and browns, suggestive of the natural appearance of the materials. I was cognisant of how the bricks in my house are of a wide variety of colours. Having finished the four, I realised I could have saved myself a spot of bother with the roofs by using (vegan) yoghurt pots. D'oh! That said, it means the easy little things should be even easier to replicate.

As an aside, you can see upside down in that last photo I have used a cardboard tube of Glen Somethingorother. It's Aldi's attempt at a single malt, and is everything you would expect a single malt priced £11.49 to be. I wanted to give it the benefit of the doubt. That said, although it is an abomination as a single malt, it's better than something like Jack Daniel's or Bell's when used in a cocktail, and vastly cheaper than those overpriced tipples, so I may yet buy it again provided it's going into something where I can't taste it. Don't buy it for anyone who likes single malts unless they have a bad case of the flu, and can't taste anything. ;) It is not the amber nectar in the glass on the desk in the background. I think that was some Laphroaig.


Monday, 17 October 2016

Ancient Egyptian Tomb in 28mm

Sinister ruins from the age of the pharaohs - and Happy Six Hundredth Blog!

What lies in the darkness of the tomb? A king's ransom in precious metals and ancient artefacts or a vengeful mummy, wrested from his slumbers by odious graverobbers?

Construction


A nice simple little project here. Just a wee oblong bit of packaging, with foamcard glued to most of the sides, and a ruined entrance built up from offcuts. I peeled the paper off one side of the foamcard,  and scribed in details of stonework. I wanted it to look fairly imposing, so deliberately chose to make the stones look like large pieces. They aren't cyclopean, but they are pretty hefty. Once the piece was assembled, I gave it a coat of polyfilla over the stonework, and glued sand to the base.

Painting

A really simple bit of work again. I gave the piece a grey undercoat. You can see this in the recesses in the photographs, but in the flesh it's almost invisible. Then I applied a coat of some cream paint. Once that was dry I picked out the recesses in the stonework with diluted dark brown paint, and then gave the whole a drybrush of the dream mixed with the white. I'm very happy with how it came out.


Saturday, 15 October 2016

Pound Store Vinyl Tiling Makes Great 15mm Stone Roadways

Vinyl Floor Tiles

As I said the other day, pound stores are an under-realised goldmine of assorted wargaming scenery. I spotted a pack of floor tiles in there the other day, and was thinking about using it for a river. More on that another day. What I noticed while cutting it up was the fine texture on the surface. Again, just in case your pound store has stuff in it that costs more than a pound (as mine weirdly does), these tiles come in a pack of four and that pack costs a quid. They are exactly 12" across (c.30.5cm), so it's easy to work out how many you'll need for a given project. They have a paper backing, which peels off to reveal an adhesive side. I recommend marking out your dimensions on the paper backing, and cutting them (carefully, naturally) with a knife rather than scissors.


Painting them up


I decided to just do a little test piece for now. So I nabbed a snippet, undercoated it with Halford's matte grey spraypaint, and then gave it a series of drybrushes. I prefer my stones not to be blankly grey, so atop the grey I drybrushed Citadel Dry Nurgling Green, then Citadel Layer Ushabti Bone, and very delicately Citadel Layer White Scar. Obviously, other colour combinations are available. This worked for me. As you can see, the wood effect on the sheet is rendered invisible by the grey undercoat.


Wednesday, 12 October 2016

Great War Boardgame

 Tanks

I picked up both the main expansion for the Great War boardgame, which features male and female MkIVs and German A7Vs, as well as German artillery, and the Whippet expansion, which I'll go ahead and assume needs no explanation.


Artillery

In addition to the German artillery (105mm guns), I also picked up some British opposition (18pdrs). I'm easily amused, so having this gun in 28mm, 15mm and 6mm makes me smile. :D They come in the usual brown plastic for the Brits, and grey for the Germans. They have been undercoated in the following pictures.


Flames of War

Obviously, the primary reason for purchasing these models is to use them with the boardgame. However, my mate fancies getting into Flames of War's WWI expansion, and so I'll be working out how to use these guys for both systems before basing anybody. Obviously, in time I shall expand my collection beyond just the plastics so I have a broader range of poses - and some officers, too! Hopefully, in a few months, we'll get a game in.

Saturday, 1 October 2016

The Empire Needs You!


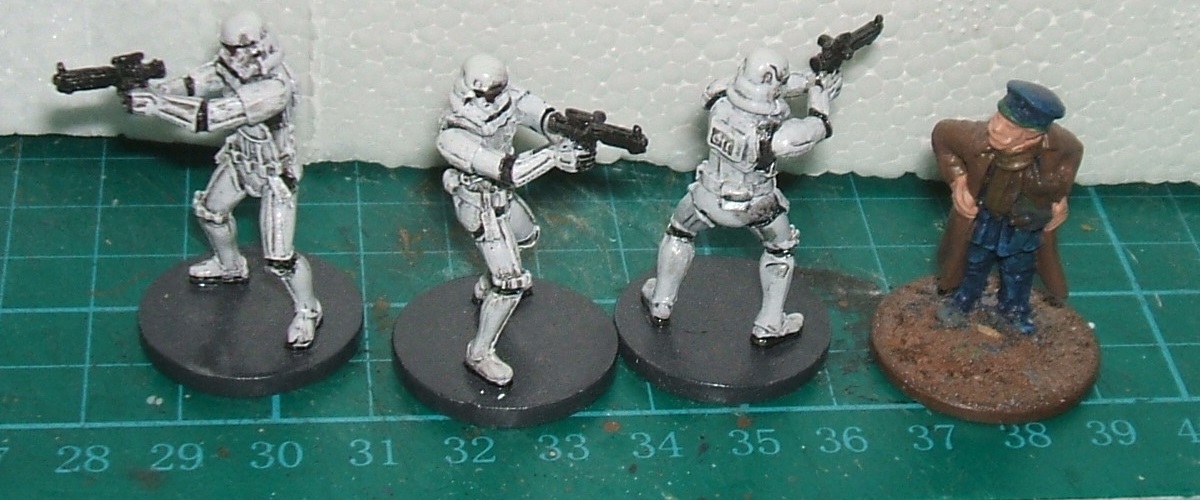
I was in Wales the other month, and chanced on a new gaming store in Swansea. Naturally, I couldn't resist picking up some Stormtroopers, though I managed to resist the siren song of Imperial Assault itself. It's just a matter of time before my resistance is crushed, mind you. They are lovely little models. A minimum of mould lines. It's a shame there is only the one pose, but when I get some more, it'll give me incentive to get out sharp implements to perform a spot of battlefield surgery. They aren't 28mm, as I had suspected (or known?), but are similar enough in size to the larger 28s that they can stand (in their crouched pose) beside them without too much bother.

In the comparison shots are a tall chap from Renegade's 28mm WWI range and a wee Scots officer from Musketeer's 25mm range. I undercoated the Stormies white, gave them a wash of that Nuln Oil black wash, dry-brushed the armour white again, and picked out the recessed details in black. The bases got a dark grey, and then the whole model received a gloss varnish, resulting in the floors resembling those of the Death Star. I did experiment with some ruddy shading for the eyes, but it hasn't worked. I must bear in mind that one needs greater contrast with little things.


Monday, 18 July 2016

Warhammer Fantasy for Frostgrave: Part III

Next up in the queue is this bunch of blue-tinged adventurers. You can see here one of the Norse chaps, and one of the two Amethyst Imperial wizards. Both originally had scythes. Both soon lost them.


Saturday, 16 July 2016

Warhammer Fantasy for Frostgrave: Part II

I've managed to get some of the models done up for Frostgrave. Some of them need some plain round shields, which I have somewhere or other. The painting is a simple affair, as I want to get these chaps done quickly en masse, and so involves base-coating several in the same shade, doing a spot of detailing, and calling it done. They will all get a spot of dark brown varnish eventually, and some matte sprayed over that.


Monday, 11 July 2016

Warhammer Fantasy for Frostgrave

I'm having a get-together her at the end of August with some old friends from uni. One's promised to bring Frostgrave with him, and introduce us to it. So I've dug out some old Warhammer Fantasy models to whip into shape. There seem to be some wizards, High Elves (so I'm unsure how much use they'll be), Wood Elves (whose ears one cannot make out), Bretonnian archers, some Empire swordsmen, some Estalian swordsmen, and a few Norse (do GW do those any more?). The funniest little Norse chap with his ginormous axe and horned helmet still looks more realistic than the sorts of things one sees these days, and he just looks nuts!

Truthfully, two of the Norse look perfectly fine - to my inexperienced eye, admittedly - for historical use. As you can see, I'm nowhere close to finished with these chaps yet. These are just WIP shots. I'm aiming for a variety of colour across them all. Some groups will fit thematically better together than others, e.g. one could attach a couple of archers to any warband, but the Norse may look odd with others, and the distinct stylings of the Empire and Estalian troops strongly suggest they ought to stick together. Then again, the wizards of the College of Light and the Grand Theogonist Whatsisname don't really fit with the other chaps terribly well. Perhaps that's fine, though; a wealthy magician simply turns up and throws money at some hired muscle. Yes, that sounds about right.


Saturday, 9 July 2016

Return to Napoleonics

Come the end of August, I have arranged for some old friends to visit for the weekend for a spot of gaming. As part of my preparations for that, I've been pulling miniatures long abandoned, and getting them ready for a battle or two. A load of Napoleonic troops are currently on the desk. Some of them received a very basic paintjob back in the day - and I don't even intend to try to get them repainted for the summer. I just mean to base them, pop a spot of protective varnish on, and then they should be good enough for gaming. Some infantrymen who never had any work done on them have had a coat of undiluted PVA, as I understand this should help them retain their paint. Wish them and me luck!


Saturday, 25 June 2016

Lost in the Jungle

Inspired again by Mel the Terrain Tutor, I have been revamping some old jungle terrain, which has been long abandoned. This mainly amounted to covering the bases with loads of cheap herbs - the purchase of several tubs of these led to a certain amount of bemusement on the part of the lady operating the checkout. My explanation that I was working on a jungle didn't seem to clarify things. How odd!


Anyway, I had and have in mind to use it for games of dinosaur hunting and, of course, Predators hunting humans. I need to get some more gloss varnish to give these a protective coat once they have had a highlight or two, but for now they look pretty fine. This is the majority of my jungle, but I have a few plants left over, and am in the process of making some bamboo outcrops.

Thursday, 23 June 2016

The Hunt for Red September: a practice naval board.

There is a top-notch chap on Youtube called The Terrain Tutor (well, his name's Mel, but we risk being drawn into a Wellington/Wellesley distraction). He has a plethora of wonderful videos for the enthusiast, and I encourage you to check out his channel. He has a true passion for the hobby, which he communicates beautifully. One of his great tips was for creating a textured surface for a gaming board using filler. It's a bit too late for me to apply this idea to my own land boards, as they are already coated with sand. However, I have long fancied making a naval board, but was unable to get my head around how to do it. When I saw this I had a eureka moment. I shan't detail the way I made this, as he covers that perfectly in his video.

The colouring is also simplicity itself; I laid down some dark greens and blues, let them dry, then coated them with a single slightly lighter blue, and let that dry, and then applied a protective layer of undiluted PVA. After allowing that to dry, I dry-brushed white onto the board. You can make out the greens and blues in the photograph, but in the flesh the whole appears fairly uniform. I am very pleased with that, because it means that those colours have gone on just right. The PVA is essential both as a protective coat and to provide a sheen to the majority of the sea. I drybrushed the white on after it because I was mindful of advice in Richard Windrow's Osprey book on Terrain Modelling.

I made a handful of mistakes there, so I want to highlight them for you. Do not drybrush to the edge of the board or you'll end up with a white perimeter. Don't make your drybrushing strokes long lest you end up with obvious areas that are clearly brush-strokes. I know it's tempting when using a  brush! Take a break instead.

Here are a few photos of the board (you can make out some of my naval reading in the background). A small Soviet/Russian force (1/3,000s, though I forget which manufacturer!) is making an appearance: a Typhoon-class submarine (I have two more), and then every other Russian ship I have: a couple of Kyndas, a Kuznetsov, two Sovremennyys and a pair of Kresta IIs. I picked up these guys and a handful of (mainly American) NATO ships some years ago, but never got round to doing anything with them. Truth be told, I prefer my dreadnoughts, but I sent them off to a friend some time ago! Anyway, the diabolical capitalists are in  the process of being painted, so perhaps some day they'll kick consarned Russky ass. Balance in the UK means being rude to both sides. :D


Monday, 14 March 2016

Great War Teaser

A 28mm Renegade 18-pdr gun with its 6mm counterpart from Baccus. Guess where this is going!


Friday, 4 March 2016

Terrain Tutorial: Build your own village

Nothing could be simpler than knocking up an adobe village. Even better, provided you minimise the detailing, they're suitable for all sorts of locations: the Middle East, Mexico and the south-easterly portions of the USA, even the desert planet Tatooine.

Requirements:
Foamcard
Long pins
PVA glue
Superglue
Balsa wood
Rulers
Pencil
Sharp knife
Suitable paints
Paintbrushes, including a quite large one (a 1" brush is a good size)
Filler

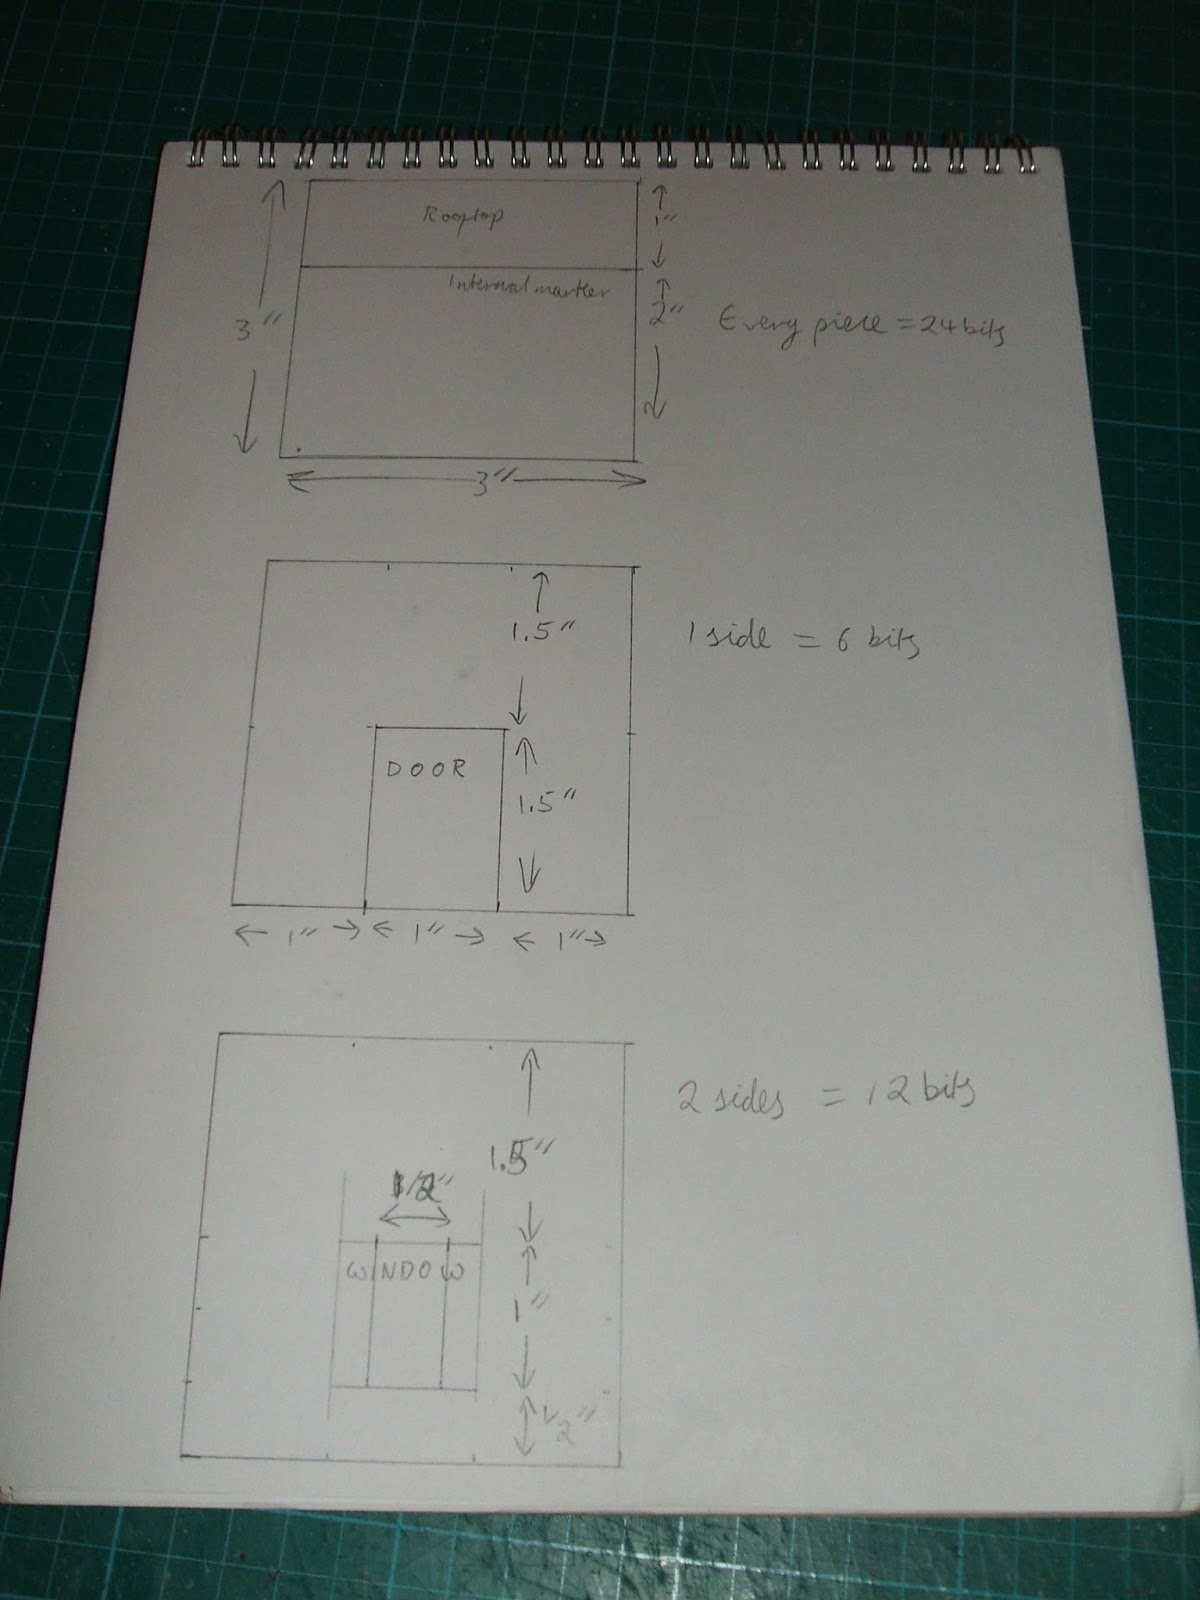
Decide how large you want your buildings to be. I decided to give most of mine a 3" (76mm) by 3" footprint on the table, and then make a few slightly larger ones for variety. I drew some 1:1 plans on an A4 pad (Fig. 1) and set to work. I carved out all the side pieces (leaving out the roofs for now), including doors, which I decided would be an inch (25mm) wide and an inch and a half (38mm) high. Owing to the size of the buildings, I elected to have windows on doors on different walls. I also marked out one inch from the top of the walls so I could place the roof there later (Figs. 2-4). After construction, I ran across another tutorial which recommended carving out a 5mm strip at the end of the wall, allowing pieces to abut very tidily. I have since tried it and commend it to you. It means less work when applying filler to hide the joins later.

When carving out your doors and windows, do not throw away the offcuts. Retain them. Line up your corners, painting some PVA on the adjoining segments, and then pin them together. Do not worry if the pieces are of slightly different heights, but do your best to ensure that the bottoms of the walls are level so that the completed dwellings will sit flat on your table. Once the walls are pinned together, take those offcuts you saved, and pin them into three corners of every four, where they will support the floor you will add later (Figs. 5 & 6).

I chose to make two slightly larger and different buildings here to add to the character of the settlement. I gave one a 4" (102mm) long back wall, and the other a 4" (102mm) long front and 5" (127mm) long back wall. In both cases I cut a strip of 1" (25mm) wide foamcard and then cut it into pieces to form an external staircase. I recommend decreasing the strips of steps as they are stacked by 1/4" (6mm) for a good appearance, e.g. if the lowest strip was 76mm long, the second should be 70mm, and so on. As before, apply PVA glue and secure the pieces with pins (Figs.7 & 8).

Let everything dry overnight, then remove the pins. Twist them through a complete circle in order to break the glue's hold on them so you can remove them easily. Round off the sharp edges of the buildings with a sharp knife. Create some damaged sections for verisimilitude. Remove some of the paper covering, and carve bricks into the exposed foam. Make some roofs to fit the buildings, and carve a 20mm by 20mm square close to one corner unless the building has an external staircase. As before, glue and pin in place, leave to dry, and remove the pins when dry (Figs. 9-11).

Mark on balsa sheet your doors, windows. Remember to make them large enough to overlap the door-frames and windows. Using a ruler and pencil, score them to suggest planking (you may need to repeat this after staining), then dye them with diluted paints. This gives an initial suggestion that the wood is sun-bleached (Fig. 12). I chose to stain each building's wood differently. Do not worry if some pieces are more strongly stained than others as it is what happens in reality. Once dry drybrush with a colour to suggest the wood is weather-beaten. I used a cream.

Mix up some filler and apply it with the large brush across the building to provide some texture, taking care not to obscure the brick detail you have scribed in place. Once this has dried, repeat the procedure, applying the filler only on the pieces of wall not scribed with brickwork. Wait for this to dry, then paint the buildings in your choice of colours. I mixed a brown with a cream, and used that for my base coat. I applied a heavy drybrush of cream over that, and a final lighter drybrush of white. Some of the filler had dripped into the buildings, so I carefully removed that at that point. Then I applied superglue around the insides of the doorways, windows and roof hatches, and glued the differently stained and drybrushed woods in place.

And you're done! Enjoy your village. Note in Figs. 9-11 the larger building with the domed roof. Look out for a feature on that building shortly. The general principles are similar to these buildings.





Related Posts Plugin for WordPress, Blogger...